This site uses cookies to improve your experience. To help us insure we adhere to various privacy regulations, please select your country/region of residence. If you do not select a country, we will assume you are from the United States. Select your Cookie Settings or view our Privacy Policy and Terms of Use.
Cookie Settings
Cookies and similar technologies are used on this website for proper function of the website, for tracking performance analytics and for marketing purposes. We and some of our third-party providers may use cookie data for various purposes. Please review the cookie settings below and choose your preference.
Used for the proper function of the website
Used for monitoring website traffic and interactions
Cookie Settings
Cookies and similar technologies are used on this website for proper function of the website, for tracking performance analytics and for marketing purposes. We and some of our third-party providers may use cookie data for various purposes. Please review the cookie settings below and choose your preference.
Strictly Necessary: Used for the proper function of the website
Performance/Analytics: Used for monitoring website traffic and interactions
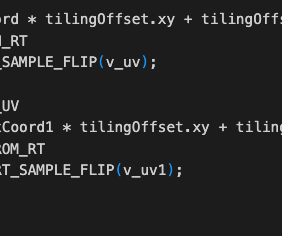
By default, the 3D Shader of Cocos will multiply the tile Tilling and add the Offset, and it also supports the flip repair for RenderTexture. _pass = this.node.getComponent(Sprite).material.passes[0]; Use the water wave effect on the 3D meshes This is only for 3D planes with tiled UV Mapping. x,waveFactor.y-uv0.y); x,waveFactor.y-uv0.y);
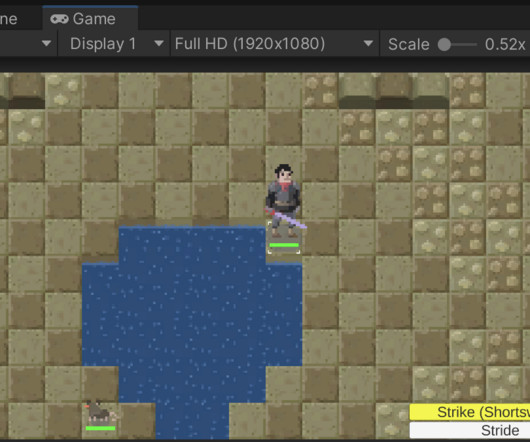
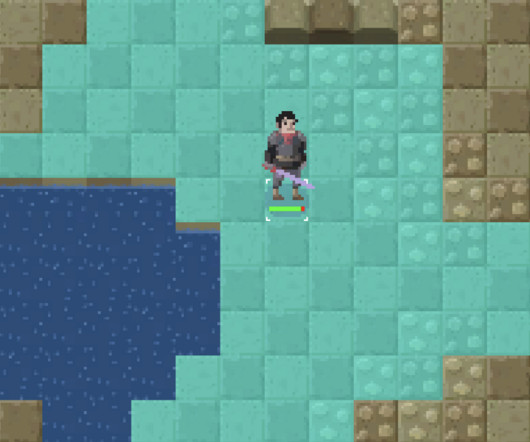
A lot of people asked about making 2D maps and how to use different types of tiles like water vs dirt. For this lesson I created a couple of simple images to use for tile maps. This asset will be sort of abstract data, and can be “skinned” with specific tiles at a later point. They are available in this package here.
In that project, we had some unique challenges thanks to a non-square board where tiles were optional. In addition we had to consider tile heights – and whether or not a unit could jump as high as needed. In contrast, the pathfinding in this lesson will be for a 2D square board with no missing tiles.
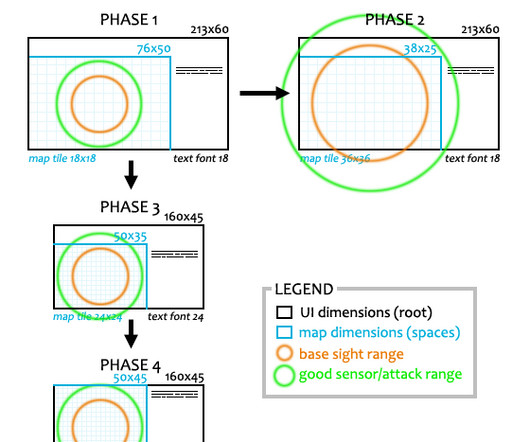
Another reason to have a decently large map view in the first place is, again, the sheer size of maps to explore, and the potentially high level of local activity out there. So ranges should for the most part be kept within that value. We’re going to need some powerful QoL features to make that playable in a serious capacity!
Because of the grid-based nature of my game, I position my sprites at whole number coordinate positions like "(2, 3)". Next I make a local variable for an optional Entity that is initially set to null. Therefore I needed to create my own array that could be re-used. I added the "results" array field for that purpose.
We organize all of the trending information in your field so you don't have to. Join 5,000+ users and stay up to date on the latest articles your peers are reading.
You know about us, now we want to get to know you!
Let's personalize your content
Let's get even more personalized
We recognize your account from another site in our network, please click 'Send Email' below to continue with verifying your account and setting a password.


Let's personalize your content