This site uses cookies to improve your experience. To help us insure we adhere to various privacy regulations, please select your country/region of residence. If you do not select a country, we will assume you are from the United States. Select your Cookie Settings or view our Privacy Policy and Terms of Use.
Cookie Settings
Cookies and similar technologies are used on this website for proper function of the website, for tracking performance analytics and for marketing purposes. We and some of our third-party providers may use cookie data for various purposes. Please review the cookie settings below and choose your preference.
Used for the proper function of the website
Used for monitoring website traffic and interactions
Cookie Settings
Cookies and similar technologies are used on this website for proper function of the website, for tracking performance analytics and for marketing purposes. We and some of our third-party providers may use cookie data for various purposes. Please review the cookie settings below and choose your preference.
Strictly Necessary: Used for the proper function of the website
Performance/Analytics: Used for monitoring website traffic and interactions
I’m trying to convert a shader from Shadertoy to use it within Cocos Creator, but I’m not sure how to properly translate the shadercode or set up the necessary uniforms. Shader I’m trying to convert: shadertoy.com Shadertoy Build shaders, share them, and learn from the best community. Thanks in advance!
It’s far more than just lines of code or compelling narratives. Game creation is a collaborative symphony of artistry, design thinking, and meticulous production, transforming initial raw sketches into the immersive, playable worlds we explore. At the very heart of this intricate process are game art production companies.
The optimization of shaders combines calculation simplification methods which lowers both shader passes and processing redundancy. Billboard Sprites reduces GPU processing through the use of simple models for distant objects. Proper memory management ensures smooth, stutter-free multiplayer gameplay.
Even after modifying the vertex buffer ( vb ), the changes are not reflecting on the sprite. Can you please provide a complete code example for setting a gradient color dynamically in Cocos Creator 3.8.2 ? Example for a vertical gradient (from startColor to endColor ) How to properly update the vertex buffer after modifying colors?
Blockquote const sprite = this.getComponent(Sprite); const mat = sprite.customMaterial; mat.setProperty(‘dissolveThreshold’, 0.5); Version 3.6.x, x, I using this code but it not bring Property affect to shader Ok, this work if turn of Packable in main Sprite inspector
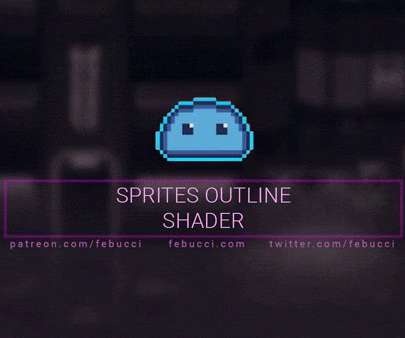
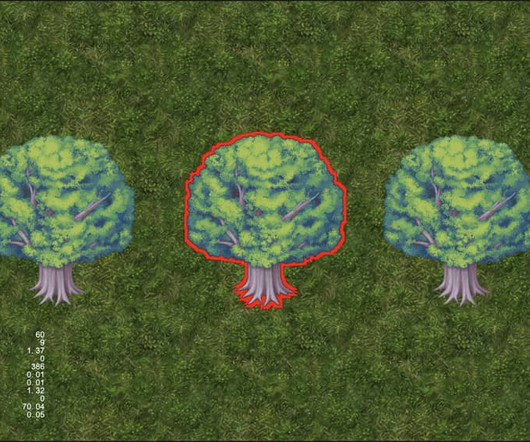
In this “Unity Sprite Outline” tutorial we’ll discover how to create both a “Sprite Innerline” and a “Outer Sprite Outline”. Simply, the Inner Sprite Outline shader is drawn “inside” the sprite, while “Outer” is the opposite. Inner Sprite Outline HLSL. Outer Sprite Outline HLSL. Amplify Shader.
About shaders. For most game developers, shaders are this scary monster that presents itself with such a complexity that it seems out of reach. In reality, shaders are quite simple by default and just get more complex the more you add to them. Our sprite is 32x32 pixels in size, and it must be drawn at some position.
I am trying to create a 'CustomMaterial' to stack 2 shader effects. Maybe someone has a better way/idea to solve the problem of only having one CCEffect on one Node/Sprite/etc…? When I do effectAsset: new EffectAsset I get an error, because of the type mismatch. Thanks, tL.
I am trying to create a 'CustomMaterial' to stack 2 shader effects. Maybe someone has a better way/idea to solve the problem of only having one CCEffect on one Node/Sprite/etc…? When I do effectAsset: new EffectAsset I get an error, because of the type mismatch. Thanks, tL.
I am trying to create a 'CustomMaterial' to stack 2 shader effects. Maybe someone has a better way/idea to solve the problem of only having one CCEffect on one Node/Sprite/etc…? When I do effectAsset: new EffectAsset I get an error, because of the type mismatch. Thanks, tL.
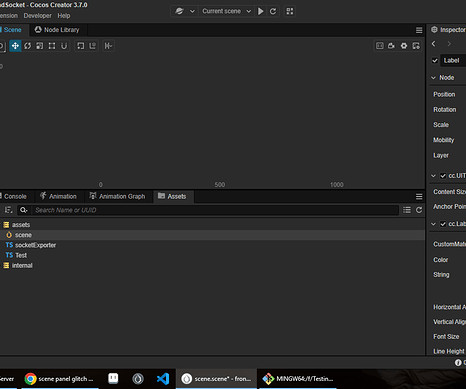
Thank you so much for telling me how to find that component, but it’s too bad it’s not related to the original problem, which is the shader. ;-( It’s simply an error log caused by a missing asset in some component. Is there a difference between applying the material to the sprite and the label?
Hello, before refering me to the tests or explaining in the theory what a shader is and how code it, can someone actually share a simple working code to apply to a sprite? I have been researching for a week now through old threads and tutorials all over the internet and the code has completly change in cocos2dx 4.0,
Hello, you may want to change the uv0 settings from the shadercode. So 0 means the far left side of the sprite and 1 represents the far right side of the sprite. In the example they show on the manual, they made it so that the effect changes along the x-axis from the uv0.x It is important to know that the uv0.x
Original: [link] Author: BitByBit Outer Stroke Effect for 2D Sprites Continuing from the previous article Inner Stroke Effect for 2D Sprites Introduction In the last article, we introduced the method of inner stroke and also discussed its pros and cons. The above is the part of the custom post-processing shader.
I installed extensions in VS C (Cocos Effect, Shader languages support for VS Code) my next thought was to get into the shader to try working with the texture there, but I ran into difficulties: 1.) I want to achieve the effect - “so that the pixels, like water, fill the empty mouth of the river.”
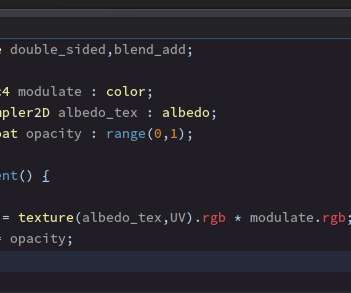
y * sin(rad); o.rgb *= mix(startColor.rgb, endColor.rgb, smoothstep(edge1, edge2, diagCoord)); o *= color; ALPHA_TEST(o); return o; } }% [topic] When I use above codes, the shaders I apply to the sprite work fine when I’m in the editor, or when I run it in an emulator. 1.0], editor: {type: color} } endColor: { value: [1.0,
y * sin(rad); o.rgb *= mix(startColor.rgb, endColor.rgb, smoothstep(edge1, edge2, diagCoord)); o *= color; ALPHA_TEST(o); return o; } }% [topic] When I use above codes, the shaders I apply to the sprite work fine when I’m in the editor, or when I run it in an emulator. 1.0], editor: {type: color} } endColor: { value: [1.0,
Hello, so my issue is such, I have made a shader that causes a UV distortion in the fragment shader, to simulate “flame-like” effects at the edges. There are two variants of these shaders, one where the distortion is dependent on cc_time[0] i.e the time elapsed in seconds when a game is running. 1.0 - newUV.x), min(newUV.y,
The shaders that are part of Cocos2d-x v4 should be plentiful to learn from, but if you want to know how to convert between an implementation you may see online to what cocos2d-x requires, then the following may help you. 1 + iMouse.x; vec2 R = iResolution.xy, S = vec2(160,100), p = ( U+U - R ) / R * S, q = vec2(cos(-t / 165.),
Hi, I am writing a simple shader for spine, and use ts code to animate that shader by setProperty function. The same logic work with sprite, but not Spine. How can I make setProperty work inside a tween? Here is my demo TestShaderSpine.zip (5.3
Hi, I am writing a simple shader for spine, and use ts code to animate that shader by setProperty function. The same logic work with sprite, but not Spine. How can I make setProperty work inside a tween? Here is my demo TestShaderSpine.zip (5.3
Hi, I am writing a simple shader for spine, and use ts code to animate that shader by setProperty function. The same logic work with sprite, but not Spine. How can I make setProperty work inside a tween? Here is my demo TestShaderSpine.zip (5.3
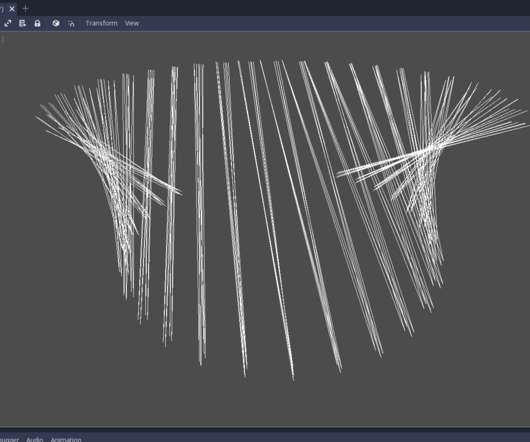
A lot of text and no code so far, so here you go! Here is a link to a file to show what "low level class registering" might look like in future (this is already working code). Yes, some more invalid OpenGL state was fixed and a first attempt to get spatial shaders working and then this could be seen. Since OpenGL 3.1,
Most of my time working in cocos has been devoted to shader work. That being said, I’m trying to determine if I can do something a certain way, and, if so, can someone provide a basic example of what the code would look like? I would like to put the image of the card’s back as the default sprite frame.
x is that, several times, sprites are separated in many nodes in order to be animated or assembled. If a shader is applied to them, or if transparency is changed, the effect is applied to every node individually, given they each do it in their own draw call. This has been added for 4.0 thanks to the new DirectionalLight2D node.
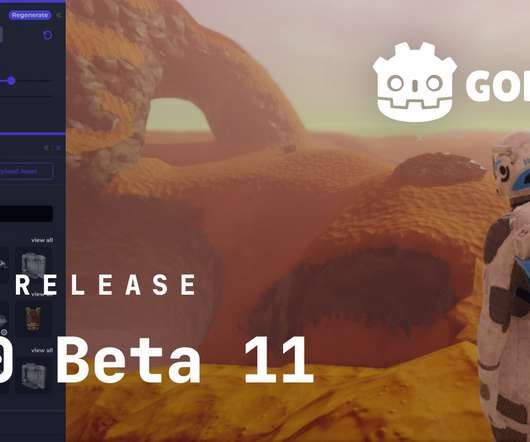
This beta includes a few big changes which may interest a lot of users: Animated sprites, both 2D and 3D, now support options for more precise timing of individual frames ( GH-65609 ). Editor: Remove compatibility code for MeshInstance3D surface override material ( GH-70466 ). Editor: Improve remote tree node tooltips ( GH-70880 ).
Godot's code base is big, but well organized. Prerequisites: Laptop with Git, and for code contributions a C++ compiler installed. A presentation/discussion about the approach to the code and assets structure, and how it works for your team depending on the composition and experience of said team.
The most commonly used method involves rendering the camera to a RenderTexture (RT) and then displaying it on a Sprite. Taking inspiration from community experts @gamemcu and @iwae for the ultimate solution, we can use code to directly display the post-processed RT rendered by the camera onto the final window.
link] [link] [link] [link] [link] Prerequisites Some knowledge of code is definitely going to help here. I’ll be writing most code in Godot’s Gdscript, so familiarity with that or Python will help. The first thing to download will be the sprites and textures from the original tutorial.
Visual shader editor. all rendering code was rewritten to use the more modern OpenGL ES 3.0 / OpenGL 3.3 Some shader features will not work and throw an error when used (which is to be expected when using an older OpenGL version). GDScript allows to write code in a quick way within a controlled environment. 2D skeletons.
This beta includes a few big changes which may interest a lot of users: Animated sprites, both 2D and 3D, now support options for more precise timing of individual frames ( GH-65609 ). Editor: Remove compatibility code for MeshInstance3D surface override material ( GH-70466 ). Editor: Improve remote tree node tooltips ( GH-70880 ).
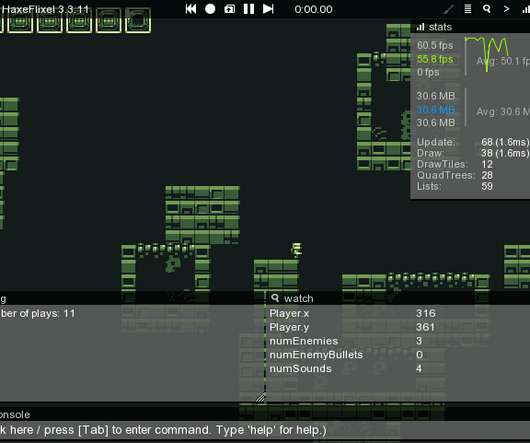
This drastically reduces drawcall-related bottlenecks and can give massive gains in specific scenarios (drawing lots of sprites, big TileMaps, text rendering). Top: 10,000 Sprites with a randomized modulate and position. Bottom: 8 layers of a screen full of "A"s with two Sprites intermixed. Can you spot the difference?
Some of the features were added just because they were fun to code and have this “cool” factor about them. GDScript is my favorite as you can do a lot with a little bit of code. Overriding properties like script variables, or sprite color via modulate property, allows to make asset variations easily. That one was tricky.
The engine should be able to render and simulate 200+ lightweight game objects -- frame-animated sprites with simple collision, no fancy physics or shaders. I also liked how Haxe has decent autocompletion support in VS Code, which reduces (but doesn't quite eliminate) all the documentation hunting. and no WASM.)
I want to write a shader. In this shader I need to be able to determine the position of a fragment relative to the geometry it belongs to. Whether this position will be in normalized coordinates from 0 to 1 or in a value from 0 to the width/height of the sprite - 1, it is not so important to me. Here they are called effects.
Hi everyone, Im facing an issue with applying a gradient effect to both simple and sliced sprites. uintVerts) return; const color = this.node.color; const floatsPerVert = _assembler.floatsPerVert; const colorOffset = _assembler.colorOffset; This worked fine for both SIMPLE and SLICED sprites. ShaderCode (.effect
However, when I try to do the same for a sliced sprite ( cc.Sprite.Type.SLICED ) , the color is not applying as expected. Can you please provide a complete working code for setting vertex colors on a sliced sprite ? Any help would be greatly appreciated! Thanks in advance!
Remember the golden days of 2D sprites and pixel-perfect jumps? Massive asset libraries, third-party plugins, and spaghetti shaders start to weigh everything down. Look at garbage collection, dynamic batching, or shader compilation hiccups. Use Sprite Atlases. Batch materials with the same shader. Cache components.
We organize all of the trending information in your field so you don't have to. Join 5,000+ users and stay up to date on the latest articles your peers are reading.
You know about us, now we want to get to know you!
Let's personalize your content
Let's get even more personalized
We recognize your account from another site in our network, please click 'Send Email' below to continue with verifying your account and setting a password.


Let's personalize your content