This site uses cookies to improve your experience. To help us insure we adhere to various privacy regulations, please select your country/region of residence. If you do not select a country, we will assume you are from the United States. Select your Cookie Settings or view our Privacy Policy and Terms of Use.
Cookie Settings
Cookies and similar technologies are used on this website for proper function of the website, for tracking performance analytics and for marketing purposes. We and some of our third-party providers may use cookie data for various purposes. Please review the cookie settings below and choose your preference.
Used for the proper function of the website
Used for monitoring website traffic and interactions
Cookie Settings
Cookies and similar technologies are used on this website for proper function of the website, for tracking performance analytics and for marketing purposes. We and some of our third-party providers may use cookie data for various purposes. Please review the cookie settings below and choose your preference.
Strictly Necessary: Used for the proper function of the website
Performance/Analytics: Used for monitoring website traffic and interactions
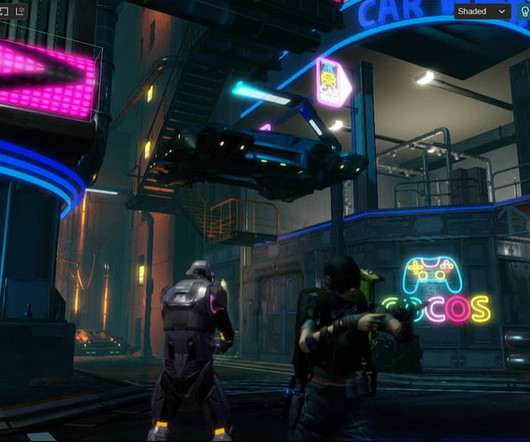
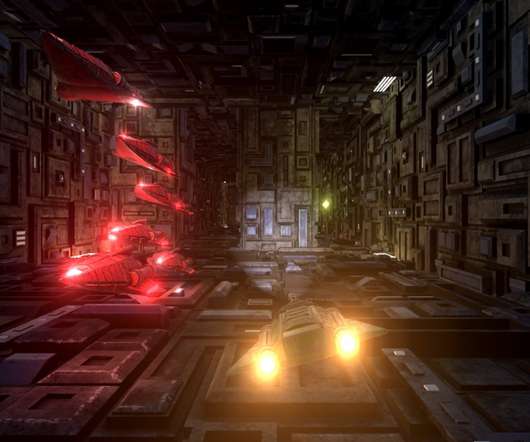
This article will delve into the principles and code of the static occlusion culling solution in Cocos Cyberpunk. That brings us to a highly cost-effective rendering performance optimization solution called (Static Occlusion Culling, SOC) implemented in Cocos Cyberpunk. Occlusion Culling Let’s start with the following figure.
In addition, RenderDoc, which is integrated into Unity’s editor, allows for frame capture and detailed analysis of how frames are composed, down to native graphics commands and GPU resources. Unity introduced Solid Angle Culling as an optimization to mitigate this overhead.
It lacks the ability to process mesh in a coarser grain than triangle, like meshlet culling. The underlying idea of the algorithm is, in the first place, to do culling, then draw the effective parts of mesh. With MeshShaders, the culling algorithms we use can be of great flexibility.
1、 Comprehensive TPS gameplay framework 2、 A reusable implementation of Custom Render Pipeline 3、 Forward & Deferred Rendering, PostProcessing 4、 Usage of Reflection Probes 5、 Static Occlusion Culling 6、 Compatible with High-end, Mid-end and Low-end devices In this article, we will locate the files that correspond to the features above.
By utilizing these powerful features, the graphics of your games will become more realistic. Get it for free: [link] Despite my excitement, I consulted with the person responsible for the graphics in Cocos Cyberpunk to verify certain aspects before downloading from the Cocos Store. is capable of handling big projects.
It can be directly in the AS build calls or in some related task like the culling of the objects. Cull instances for TLAS. Instead, cull instances depending on the situation. For example, consider culling based on an expanded camera frustum. Use face culling only when required for correctness.
There are some useful intrinsic functions in the NVIDIA GPU instruction set that are not included in standard graphics APIs. There are some useful intrinsic functions in the NVIDIA GPU instruction set that are not included in standard graphics APIs. Realistic use cases of the intrinsics in graphics applications are usually complicated.
Have you ever played a game with amazing graphics, but something just didn’t feel right? Optimize your lighting by using techniques like Levels of Detail (LODs) and culling. The problem might be the lighting. Special functions that let you create cool lighting effects, like lights that pulse or flames that flicker.
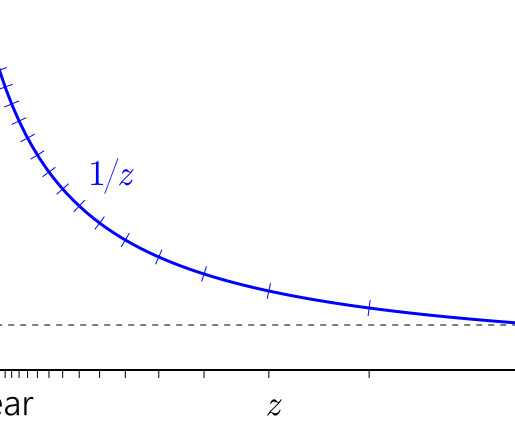
Depth precision is a pain that every graphics programmer has to struggle with sooner or later. Depth precision is a pain that every graphics programmer has to struggle with sooner or later. This post was originally published on the Developer Zone. This post was originally published on the Developer Zone.
More details can be found under Unity’s official documentation page for Draw Call Batching : Draw calls are often resource-intensive, with the graphics API doing significant work for every draw call, causing performance overhead on the CPU side. And it has just twelve vertices.
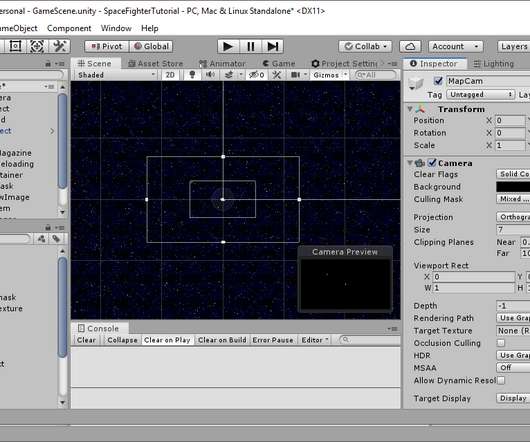
Finally we update the culling mask and remove the default layer by clicking on it. The camera will need some adjustment to work as a minimap camera but the first thing we will do is rename it to MapCam. Then we will set its projection method to Orthographic, its size to 7 and its default color to black.
Running the whole graphics rendering in a separate thread. All lights also support transmittance (to use with subsurface scattering) if shadows are enabled, but this will force the object to perform reverse culling when rendering to a shadow. When using vertex lighting, only this shadow type is supported.
Different OS, platform and export features are exposed to Godot as special "tags" The tags can be used for multiple purposes, from overriding in each platform to changing export values: Mobile, for example, comes with many predefined feature tags, to aid on reducing graphics requirements on these platforms: IPv6 support.
We organize all of the trending information in your field so you don't have to. Join 5,000+ users and stay up to date on the latest articles your peers are reading.
You know about us, now we want to get to know you!
Let's personalize your content
Let's get even more personalized
We recognize your account from another site in our network, please click 'Send Email' below to continue with verifying your account and setting a password.


Let's personalize your content