This site uses cookies to improve your experience. To help us insure we adhere to various privacy regulations, please select your country/region of residence. If you do not select a country, we will assume you are from the United States. Select your Cookie Settings or view our Privacy Policy and Terms of Use.
Cookie Settings
Cookies and similar technologies are used on this website for proper function of the website, for tracking performance analytics and for marketing purposes. We and some of our third-party providers may use cookie data for various purposes. Please review the cookie settings below and choose your preference.
Used for the proper function of the website
Used for monitoring website traffic and interactions
Cookie Settings
Cookies and similar technologies are used on this website for proper function of the website, for tracking performance analytics and for marketing purposes. We and some of our third-party providers may use cookie data for various purposes. Please review the cookie settings below and choose your preference.
Strictly Necessary: Used for the proper function of the website
Performance/Analytics: Used for monitoring website traffic and interactions
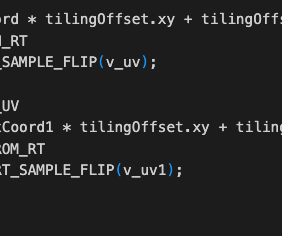
UV is also inconsistent with the world coordinate system used elsewhere in Cocos (the Y axis points upward, as shown in the figure below), and this issue should also be paid attention to when calculating the UV position through world coordinates. _pass = this.node.getComponent(Sprite).material.passes[0]; x,waveFactor.y-uv0.y);
You can use the library to easily create scenes, add layers, build sprites, handle actions and collisions, add key events, and so much more. The game’s concept is simple, click the mouse or tap the phone screen to flap the bird’s wings, keeping it in the air and avoiding obstacles. Load your Sprites and Create a Player.
This asset will be sort of abstract data, and can be “skinned” with specific tiles at a later point. I left them separate because the “data” reference is a reference to an actual project asset, and the other fields are a local “work in progress” set of data that we haven’t confirmed we wish to keep.
This drastically reduces drawcall-related bottlenecks and can give massive gains in specific scenarios (drawing lots of sprites, big TileMaps, text rendering). Top: 10,000 Sprites with a randomized modulate and position. Bottom: 8 layers of a screen full of "A"s with two Sprites intermixed. Can you spot the difference?
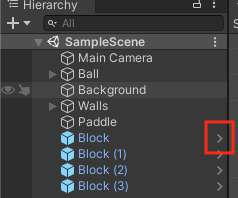
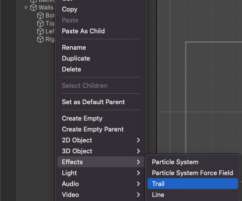
For example, you can select one Block in the Hierarchy window, and then shift + left-click the last block, and it will select all of the blocks in between. Now if you edit the “Color” of the Sprite Renderer, you will see that all of the selected blocks get the same change. Create A Prefab. Edit A Prefab.
Unity has already enabled us to easily accomplish a ton of milestones, such as rendering sprites on screen, and making objects move and collide with each other. At some point, you will always find that some of the features you want to use require the use of a script. Right-click the “Ball” in the Hierarchy window.
You can download the assets and the complete project for this tutorial by clicking on the button above. We’ll start with the Player_Character folder: Inside the Player_Character folder Right Click and create a new blueprint: The parent class is going to be Character: Name the blueprint BP_Player and open it in the editor window.
We organize all of the trending information in your field so you don't have to. Join 5,000+ users and stay up to date on the latest articles your peers are reading.
You know about us, now we want to get to know you!
Let's personalize your content
Let's get even more personalized
We recognize your account from another site in our network, please click 'Send Email' below to continue with verifying your account and setting a password.


Let's personalize your content