This site uses cookies to improve your experience. To help us insure we adhere to various privacy regulations, please select your country/region of residence. If you do not select a country, we will assume you are from the United States. Select your Cookie Settings or view our Privacy Policy and Terms of Use.
Cookie Settings
Cookies and similar technologies are used on this website for proper function of the website, for tracking performance analytics and for marketing purposes. We and some of our third-party providers may use cookie data for various purposes. Please review the cookie settings below and choose your preference.
Used for the proper function of the website
Used for monitoring website traffic and interactions
Cookie Settings
Cookies and similar technologies are used on this website for proper function of the website, for tracking performance analytics and for marketing purposes. We and some of our third-party providers may use cookie data for various purposes. Please review the cookie settings below and choose your preference.
Strictly Necessary: Used for the proper function of the website
Performance/Analytics: Used for monitoring website traffic and interactions
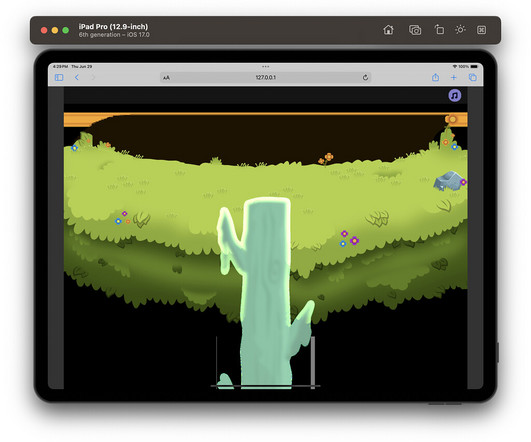
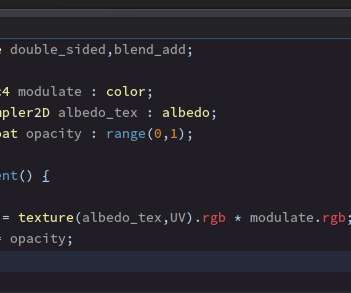
My sprite doesnt look right after given a material, I wanted to achieve a addtive like effect. The source image has smooth alpha gradient. heres what it looks like now! Im a new user and unfortunately I can only post one image. screenshot-20241218-160021|437x273 Im using cocos creator 3.8.3
My sprite doesnt look right after given a material, I wanted to achieve a addtive like effect. The source image has smooth alpha gradient.screenshot-20241218-160021|437x273 Im using cocos creator 3.8.3 heres what it looks like now! Im a new user and unfortunately I can only post one image.
My sprite doesnt look right after given a material, I wanted to achieve a addtive like effect. The source image has smooth alpha gradient.screenshot-20241218-160021|437x273 Im using cocos creator 3.8.3 heres what it looks like now! Im a new user and unfortunately I can only post one image.
My sprite doesnt look right after given a material, I wanted to achieve a addtive like effect. The source image has smooth alpha gradient.screenshot-20241218-160021|437x273 Im using cocos creator 3.8.3 heres what it looks like now! Im a new user and unfortunately I can only post one image.
toiyeuvietnam: When I build for Android mobile, the sprite default_splash I set to a black background has alpha 100 but when I open it on mobile it looks like 255. Are you using apk directly made from cocos or making any changes in android studio ?
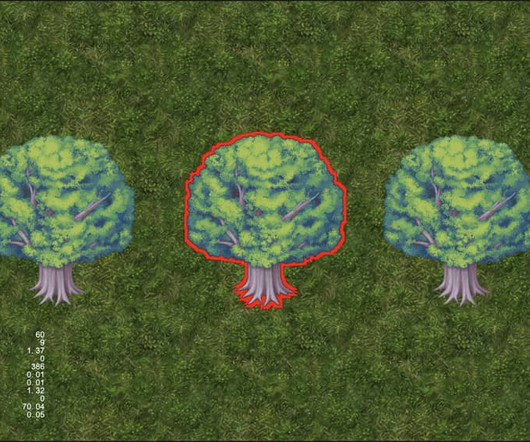
Original: [link] Author: BitByBit Outer Stroke Effect for 2D Sprites Continuing from the previous article Inner Stroke Effect for 2D Sprites Introduction In the last article, we introduced the method of inner stroke and also discussed its pros and cons. aExtend is the expanded Alpha. Here, we take the opposite approach.
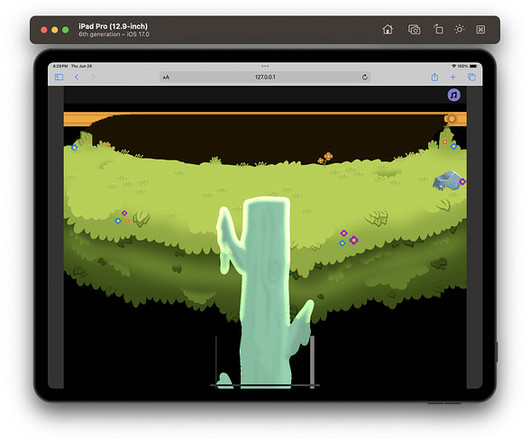
Portions of the image are getting highlighted where alpha is less than 1 but not 0. The sprite boundaries (where alpha is less than 1 but not 0) shows white patches on the screen unlike the earlier versions of iOS. is there any fix for this? slackmoehrle
Portions of the image are getting highlighted where alpha is less than 1 but not 0. The sprite boundaries (where alpha is less than 1 but not 0) shows white patches on the screen unlike the earlier versions of iOS. is there any fix for this? slackmoehrle
If you want to eliminate the black edges in Bilinear mode, you need to premultiply the map alpha and change the blend src of the image to ONE. After importing the image into texturePacker, the Alpha Handing is selected as Premultiply alpha, and then the Extrude and padding of Sprite need to be changed to 0. png.zip (8.6
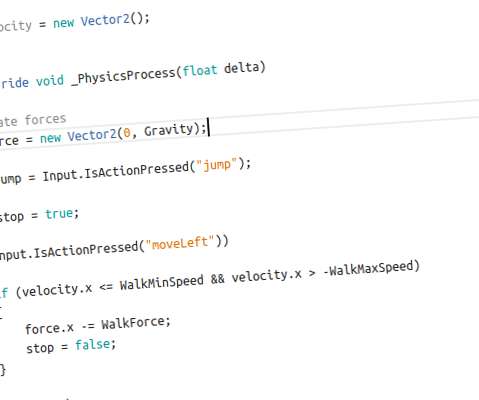
The goal is to make my effect able to follow the position of my node. 5 + ((gl_FragCoord.xy)/ iResolution.xy); p.x *= iResolution.x / iResolution.y; float dist = length(p); float radius = ((cc_time.x) ) * 0.3; float intensity = smoothstep(radius, radius + 0.15, dist); gl_FragColor = vec4(1.,1.,1.,intensity); intensity); } }% // In typescript this.
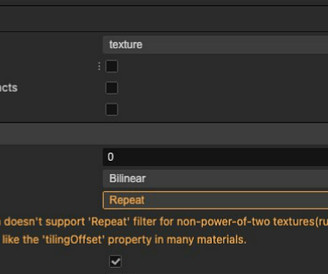
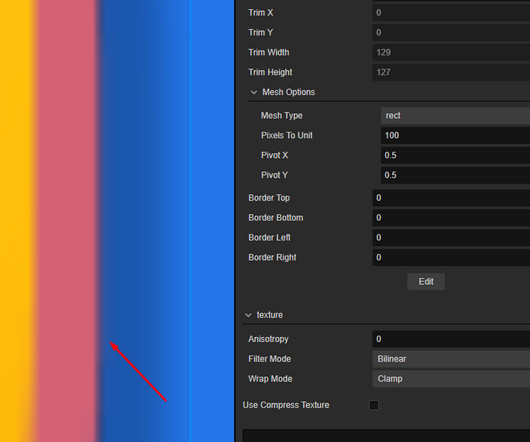
According to docs turning on this option should resolve the issue of dark artifacts appearing close to the border of transparent images but I’m seeing this exact issue in my game even though this option is turned on.
According to docs turning on this option should resolve the issue of dark artifacts appearing close to the border of transparent images but I’m seeing this exact issue in my game even though this option is turned on.
Thank you for the quick response. Wrap mode was already set to ‘Clamp’ so that wasn’t the issue. But I tried changing the Filter Mode from ‘Bilinear’ mode to other options and the problem disappears! So it seems like this issue only happens when the filter mode is set to ‘Bilinear’ and the other options do not have this problem.
According to docs turning on this option should resolve the issue of dark artifacts appearing close to the border of transparent images but I’m seeing this exact issue in my game even though this option is turned on.
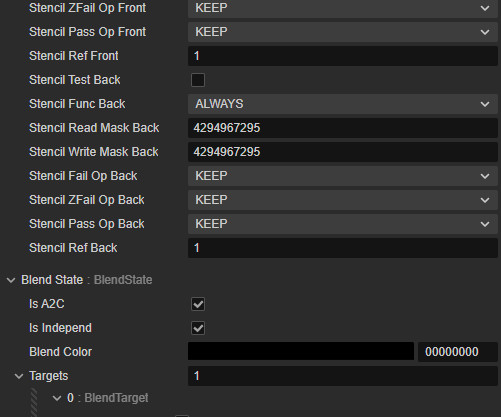
Hello all, I have a shader that takes the alpha value of one texture and applies to a sprite frame. I prefer to go this way so that I can have a gradient fade to transparency… the mask component uses the stencil buffer and isn’t set up to use alpha blending and therefore cannot utilize the gradient of alpha values.
I had tried the mask method already with no luck… but you mentioning it here pushed me to go try it some more… actually, I still had no luck using the graphic stencil… but the graphic ellipse did the trick perfectly! You saved me so much time!
Hello all, I have a shader that takes the alpha value of one texture and applies to a sprite frame. I prefer to go this way so that I can have a gradient fade to transparency… the mask component uses the stencil buffer and isn’t set up to use alpha blending and therefore cannot utilize the gradient of alpha values.
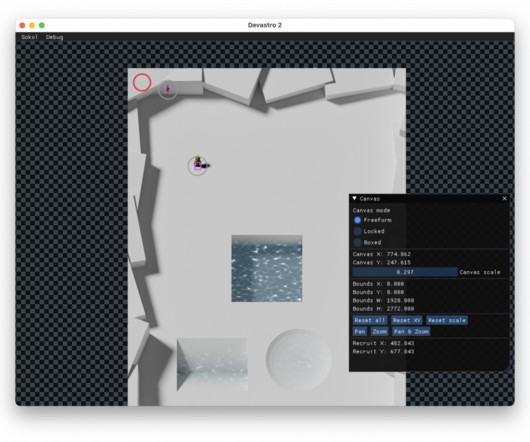
I export the rendered terrain from Blender as a RGBA image but with alpha value set to depth. The graphics backend rewrite took a while. However, the situation is now good. This gives me freedom in level design and saves work making tiles… tileable. Interactive elements will be placed using the in-game editor. So it’s RGBZ.
This beta includes a few big changes which may interest a lot of users: Animated sprites, both 2D and 3D, now support options for more precise timing of individual frames ( GH-65609 ). The illustration picture for this article is from The Mirror , an upcoming all-in-one game and game development platform currently in Closed Alpha.
So, I just copied from the built-in sprite effect file to mine. I’m just learning how a shader works. Now, back to the issue, I think, only “cc_matWorld” is used from #include <builtin/uniforms/cc-local> If I commented both of these lines, there were no error. But, everything stopped working as intended.
y * sin(rad); o.rgb *= mix(startColor.rgb, endColor.rgb, smoothstep(edge1, edge2, diagCoord)); o *= color; ALPHA_TEST(o); return o; } }% [topic] When I use above codes, the shaders I apply to the sprite work fine when I’m in the editor, or when I run it in an emulator. 1.0], editor: {type: color} } endColor: { value: [1.0, x * cos(rad) + uv0.y
y * sin(rad); o.rgb *= mix(startColor.rgb, endColor.rgb, smoothstep(edge1, edge2, diagCoord)); o *= color; ALPHA_TEST(o); return o; } }% [topic] When I use above codes, the shaders I apply to the sprite work fine when I’m in the editor, or when I run it in an emulator. 1.0], editor: {type: color} } endColor: { value: [1.0, x * cos(rad) + uv0.y
To explain the idea of how shaders work, let's consider a very simple shader for drawing a sprite to the screen. Our sprite is 32x32 pixels in size, and it must be drawn at some position. The following OpenGL code sends the sprite to the shader for drawing: OpenGL Commands. Multiply by 2. Substract (1, 1). 1 range for drawing).
This beta includes a few big changes which may interest a lot of users: Animated sprites, both 2D and 3D, now support options for more precise timing of individual frames ( GH-65609 ). The illustration picture for this article is from The Mirror , an upcoming all-in-one game and game development platform currently in Closed Alpha.
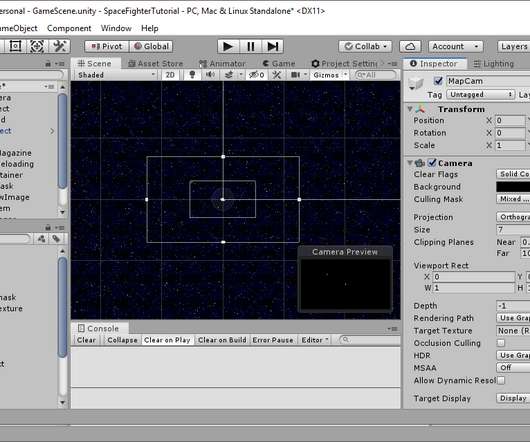
To do that we will edit the spaceship sprite by clicking on it in the project window. Then set the pixels per unit to 64 and click apply to update the sprites. This will be the mask which shows or hides part of our map based on the alpha value of the mask texture we will add. Inside that create another empty called MapMask.
x is that, several times, sprites are separated in many nodes in order to be animated or assembled. while(accum < max_dist) { float d = texture_sdf(at); accum+=d; if (d < 0.01) { break; } at += d * dir; } float alpha = 1.0-min(1.0,accum/max_dist); accum/max_dist); if (accum < fade_margin) { alpha *= max(0.0,accum
1.0 - newUV.x), min(newUV.y, 1.0 - newUV.y)); // Calculate the flame distortion amount based on the distance from the edge float distortionAmount = flameIntensity * (1.0 - smoothstep(0.0,
Hello, I’m working on a custom material/effect with a USE_INSTANCING branch that works on sprites, but does not work on a spine character. I’ve tried the different animation cache modes, and enable/disable batch. The effect is a duplicate of builtin-spine , with the instancing branches added and the two_color branch removed.
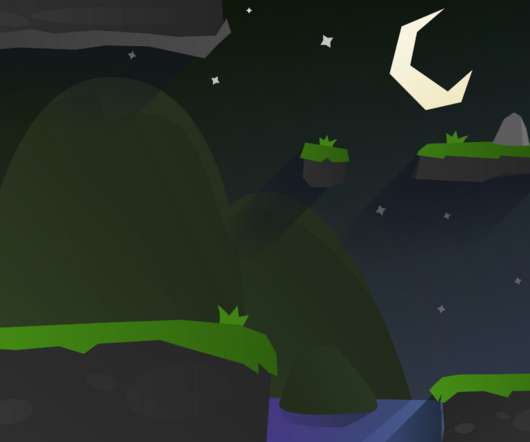
Renaming will be finished for the next alpha or beta release). The Player scene consists in a KinematicBody2D as the root node and a Sprite with the Godot logo as a child. Like always, keep in mind this is an alpha and there may be bugs and crashes. Static typing. Setting up a scene. For this example, we will have two scenes.
This allows for simplifying some behaviors, such as using a Viewport directly as a texture in a Sprite, or creating button groups without a special control. Next months will be focused in closing the remaining renderer features and stabilizing Godot for an alpha release. Local resources. Fixed rotation angles. Seeing the code.
Unity has already enabled us to easily accomplish a ton of milestones, such as rendering sprites on screen, and making objects move and collide with each other. Set the Color gradient so that it ramps the alpha down from 100 to 0. At some point, you will always find that some of the features you want to use require the use of a script.
Hi everyone, Im facing an issue with applying a gradient effect to both simple and sliced sprites. uintVerts) return; const color = this.node.color; const floatsPerVert = _assembler.floatsPerVert; const colorOffset = _assembler.colorOffset; This worked fine for both SIMPLE and SLICED sprites. What Worked in Cocos 2.4.7? Shader Code (.effect
We organize all of the trending information in your field so you don't have to. Join 5,000+ users and stay up to date on the latest articles your peers are reading.
You know about us, now we want to get to know you!
Let's personalize your content
Let's get even more personalized
We recognize your account from another site in our network, please click 'Send Email' below to continue with verifying your account and setting a password.


Let's personalize your content