This site uses cookies to improve your experience. To help us insure we adhere to various privacy regulations, please select your country/region of residence. If you do not select a country, we will assume you are from the United States. Select your Cookie Settings or view our Privacy Policy and Terms of Use.
Cookie Settings
Cookies and similar technologies are used on this website for proper function of the website, for tracking performance analytics and for marketing purposes. We and some of our third-party providers may use cookie data for various purposes. Please review the cookie settings below and choose your preference.
Used for the proper function of the website
Used for monitoring website traffic and interactions
Cookie Settings
Cookies and similar technologies are used on this website for proper function of the website, for tracking performance analytics and for marketing purposes. We and some of our third-party providers may use cookie data for various purposes. Please review the cookie settings below and choose your preference.
Strictly Necessary: Used for the proper function of the website
Performance/Analytics: Used for monitoring website traffic and interactions
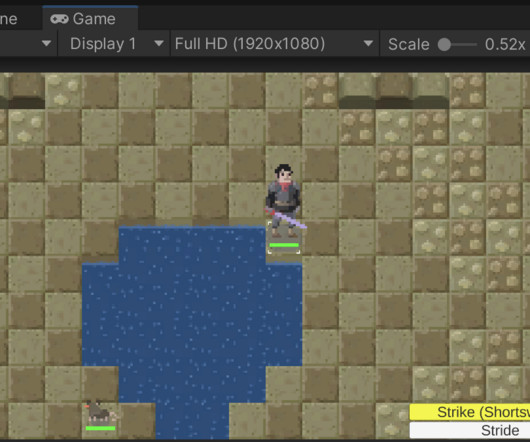
Store Link Light2D Visual editing lighting system Web Demo Address Click to check it out Other plugins by the author 2D curve texture 3.x All light source components can be visually edited in the editor, what you see is what you get. The above is the basic usage of point light and shadow functions.
You can download Godot here – [link] Click the link to Download the 4.x Unzip the folder and click on the program.exe(it should be something like “Godot_v4.1.3-stable_mono_win64.exe”) Project Setup Open Godot and click on the New Project button. Downloading & Running I am using Godot 4.x stable_mono_win64.exe”)
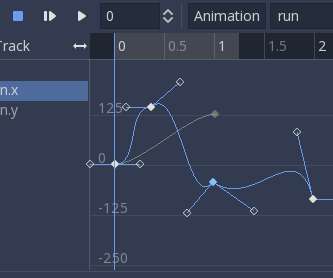
Animation editing was one of the first distinctive Godot features. Changing sprite textures, colors, animation frames, calling functions, playing animations in other animation players, playing sounds, etc. The new code is more modular, and allows extending track editing to show custom visualization. Key editing in inspector.
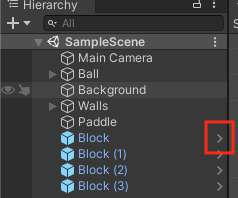
Edit Blocks. You could edit them one by one, but that would not scale well, especially if you had dozens or more blocks to fix. Unity does actually have a feature that allows you to perform a bulk edit. Unfortunately, some of the changes that you might want to make will not be supported by a bulk edit, such as in custom editors.
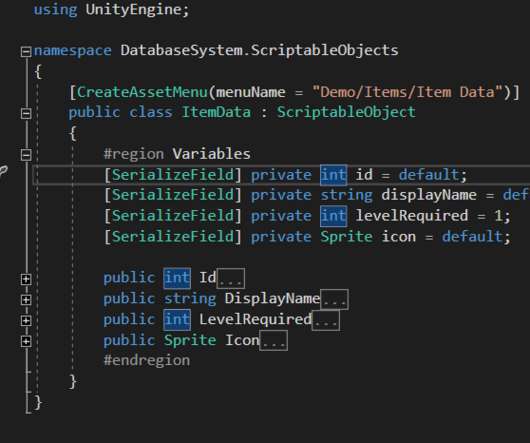
There is a high probability that you wanted to create a database and make it editable with ease for either a developer or a designer. Sprite, GameObject, Transform). It’s data is going to remain the same after we stop the game, but if we don’t set it as Dirty in the editor, it will go back to its original state at some point.
This asset will be sort of abstract data, and can be “skinned” with specific tiles at a later point. Add the following: [SerializeField] Tilemap tilemap; [SerializeField] Transform marker; [SerializeField] Point markerPosition; I will use a reference to a Tilemap to display the board data as we make it.
Unity has already enabled us to easily accomplish a ton of milestones, such as rendering sprites on screen, and making objects move and collide with each other. At some point, you will always find that some of the features you want to use require the use of a script. Right-click the “Ball” in the Hierarchy window.
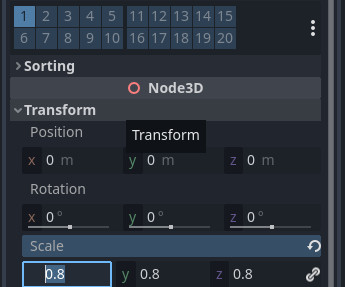
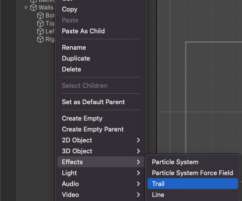
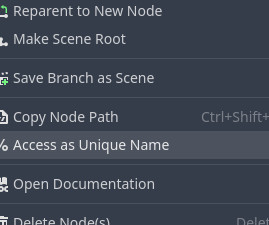
Right click on the node and select “% Access as Unique Name” This will let us use this script as a global object anywhere in the scene by just typing “%PoolController” The original script was created as a Singleton, another Programming Pattern. Expand StyleBoxTexture and we have a few settings to edit.
Before we begin, a couple of points: Some of this I've written about before, so I apologize if I'm wasting your time. There is a point where you say "I get it", but your still forced to go though the motions again and again. No point in having to solve the same puzzle over and over. That was always a sore point for us.
Before we begin, a couple of points: Some of this I’ve written about before, so I apologize if I’m wasting your time. There is a point where you say “I get it”, but your still forced to go though the motions again and again. No point in having to solve the same puzzle over and over.
You can download the assets and the complete project for this tutorial by clicking on the button above. We’ll start with the Player_Character folder: Inside the Player_Character folder Right Click and create a new blueprint: The parent class is going to be Character: Name the blueprint BP_Player and open it in the editor window.
We organize all of the trending information in your field so you don't have to. Join 5,000+ users and stay up to date on the latest articles your peers are reading.
You know about us, now we want to get to know you!
Let's personalize your content
Let's get even more personalized
We recognize your account from another site in our network, please click 'Send Email' below to continue with verifying your account and setting a password.


Let's personalize your content