This site uses cookies to improve your experience. To help us insure we adhere to various privacy regulations, please select your country/region of residence. If you do not select a country, we will assume you are from the United States. Select your Cookie Settings or view our Privacy Policy and Terms of Use.
Cookie Settings
Cookies and similar technologies are used on this website for proper function of the website, for tracking performance analytics and for marketing purposes. We and some of our third-party providers may use cookie data for various purposes. Please review the cookie settings below and choose your preference.
Used for the proper function of the website
Used for monitoring website traffic and interactions
Cookie Settings
Cookies and similar technologies are used on this website for proper function of the website, for tracking performance analytics and for marketing purposes. We and some of our third-party providers may use cookie data for various purposes. Please review the cookie settings below and choose your preference.
Strictly Necessary: Used for the proper function of the website
Performance/Analytics: Used for monitoring website traffic and interactions
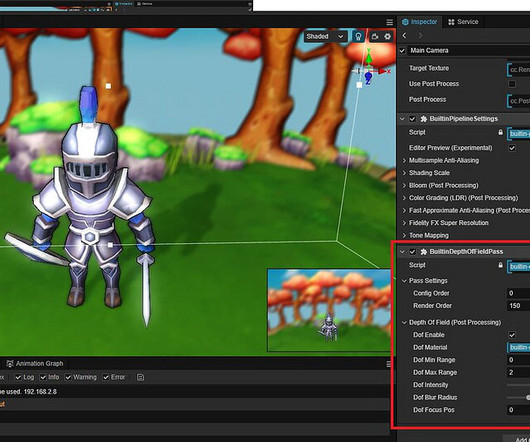
Enhanced scene view selection logic for prefabs: First click selects the prefab root node. Subsequent clicks prioritize the target point and gradually select upward. Bug Fixes Fixed an issue where auto-atlas compression left unused original textures. Improved tooltip effects in the property inspector.
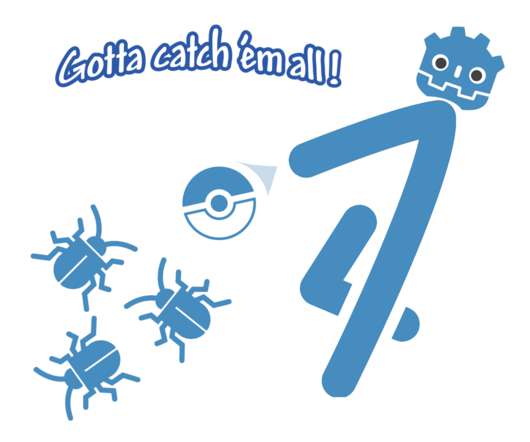
You can download Godot here – [link] Click the link to Download the 4.x Unzip the folder and click on the program.exe(it should be something like “Godot_v4.1.3-stable_mono_win64.exe”) Project Setup Open Godot and click on the New Project button. For now, we’ll create the textures for the 3d objects.
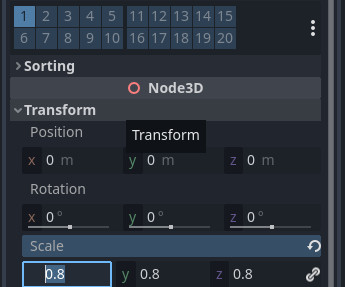
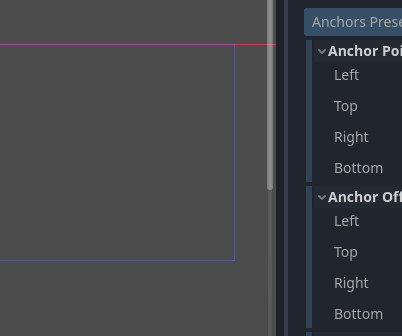
This will hold our anchor points. The two constants for ShowKey and HideKey will store the text string we add to the anchor points on each panel. We’ll start by giving them both the Texture, “Textures->UI->BlueAttackPanel.png” Next under “Region Rect” set w:50px and h:116px.
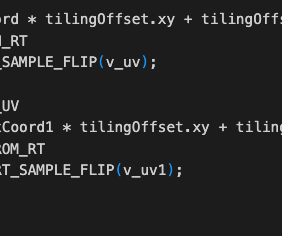
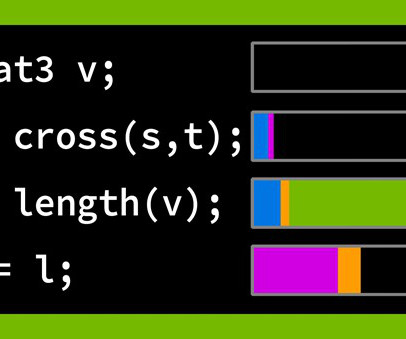
The vertical axes of textures and picture pixels is shown above, when sampling textures in shaders, that is from top to bottom, which is top-right corner. If your previous development experience is based on OpenGL, you may find that the texture on your grid is vertically flipped. the RGB of the color will be multiplied by 0.5
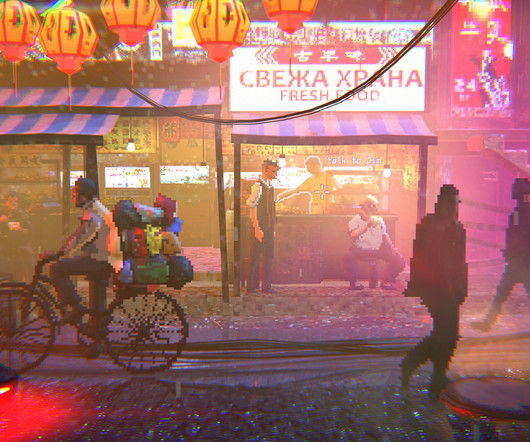
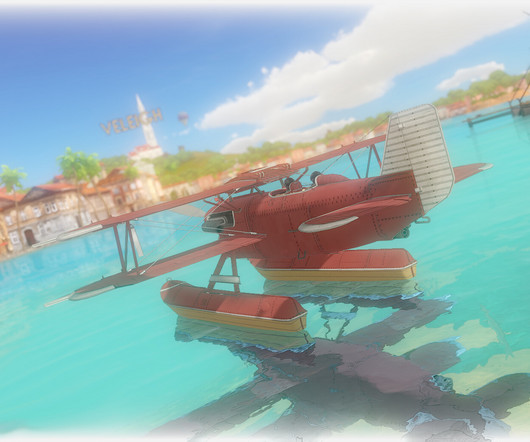
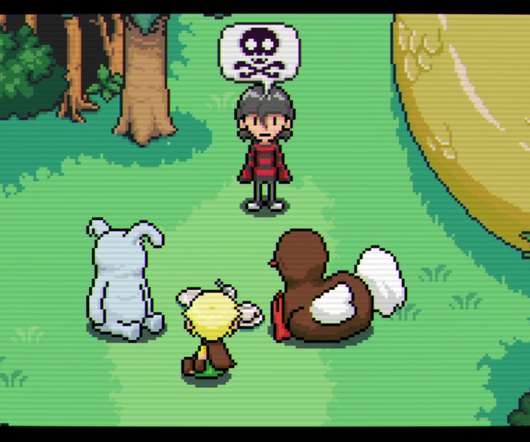
The turning point came when I experimented with adding normal maps to 2D graphics” he says. I opted for low poly 3D models with realistic textures, which I pixelated to harmonise with the pixel art style. The game’s graphics showcase a distinctive fusion of modern 3D visuals with a nostalgic pixel-art look.
The turning point came when I experimented with adding normal maps to 2D graphics” he says. I opted for low poly 3D models with realistic textures, which I pixelated to harmonise with the pixel art style. The game’s graphics showcase a distinctive fusion of modern 3D visuals with a nostalgic pixel-art look.
Thus I make an effort to use purchased art assets only as a starting point to then be modified into something more unique and fitting of the aesthetic.” “We built a prototype in our spare time and saw the potential. That’s very different to most games that tend to use hundreds of textures and multiple materials.
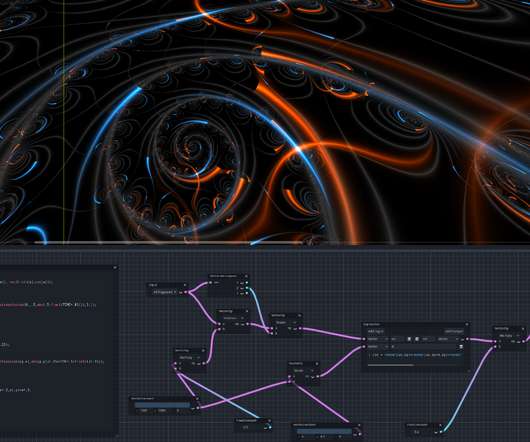
To see the available shaders first we need to create a material by Right Click -> Create -> Material: After we create the material, select it by Left Clicking on it, then in the Inspector tab you can see its options. Now that we have the shader, create a new material by Right Click -> Create -> Material.
supports advanced global illumination techniques such as lightmapping (including SH lightmapping), Voxel GI (which is fully real-time) and SDFGI (which is a single click, open world GI solution). x point releases (which we are now intending to do more often, allowing several releases per year). Additionally, Godot 4.0
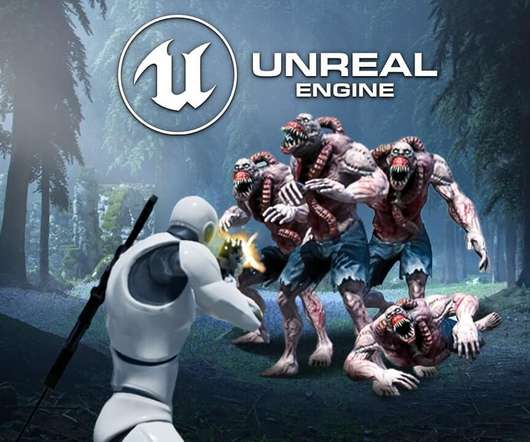
Materials are used to determine the appearance of objects, such as their color, texture, transparency, and other visual characteristics. To create a material instance, Right Click -> Materials -> Material Instance: Give the material instance a name and open it in the editor. The Basics Of Materials In Unreal Engine.
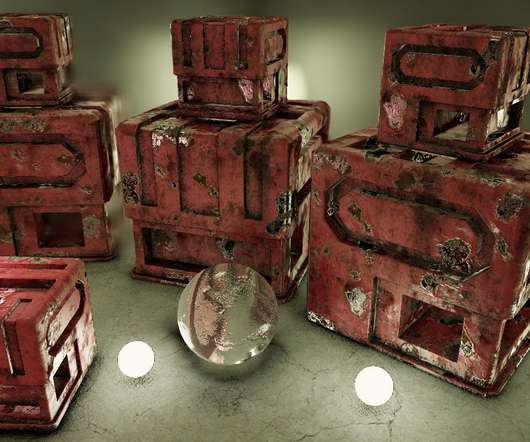
I chose the web application because it requires no downloads—just click to view. Now, without further ado, let me show you some features and technical points in this project. For example, common PBR textures utilize the RGB channels to represent Ambient Occlusion, Roughness, and Metallic properties respectively.
This time we’ll be working on some scripts to make working with anchor points in code a bit simpler, and allow us to animate some things in our UI. This time for Anchor Points set Left to.4, Click on the ParentPanel and create 3 child nodes of the type ReferenceRect and name them VRect, HRect and FullRect respectively.
Fixed a bug where preview clicks in the editor were misaligned when the window scaling was not set to 1. Enhanced scene view selection logic for prefabs: First click selects the prefab root node. Subsequent clicks prioritize the target point and gradually select upward. Improved tooltip effects in the property inspector.
That’s why they can become choke points if there’s too much to load or if something interrupts the process. Right-click the game and select Check for updates or look for an Update button. Right-click on it and choose Properties. Click Apply then OK , and run the game again to see if the issue persists.
Expand Display adapters, right-click your graphics card, and hit ‘Update driver.’ Right-click Broken Roads and choose Properties. Click the Local Files tab and select Verify Integrity of Game Files. Right-click on each non-essential application and select Disable. Press Win + X and select Device Manager.
Update Graphics Driver I make it a point to regularly update my graphics driver , as it’s often the key to solving many gaming issues. Open Device Manager : Click on the Start menu, type Device Manager , and open it. Find Your Graphics Card : Click on Display adapters to see your graphics card.
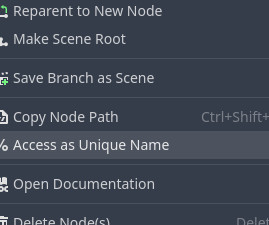
Right click on the node and select “% Access as Unique Name” This will let us use this script as a global object anywhere in the scene by just typing “%PoolController” The original script was created as a Singleton, another Programming Pattern. , and another for menu items. script to it.
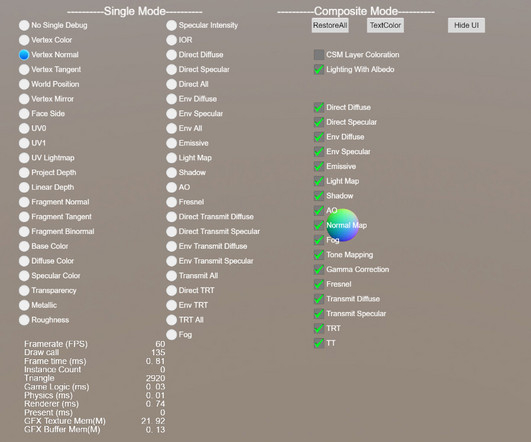
See the documentation “Render Debugging - Run Time Using Render debugging”: [link] • When the node animates, add the tween ‘destroySelf’ method to destroy the front nodal point. The Scene Editor supports selecting the next node with a single click when using the Rectangle Transform tool. Skip rendering when the UI element Opacity is 0.
Open Device Manager : Click the Start menu, type Device Manager , and open it. Find Graphics Card : Click Display adapters to see your graphics card. Update Driver : Right-click your graphics card, select Update driver , then choose Search automatically for updated driver software. Services Tab : Click on the Services tab.
Start Menu : Click the Windows icon on your screen. Expand Display Adapters : Click the arrow next to Display Adapters. Graphics Card : Right-click your graphics card’s name. Update Driver : Click on Update driver. End Processes : Click on a program and hit End Task at the bottom.
3D editor: Ability to select subscenes when clicking them in the viewport. Core: Use libsquish to decompress DXT textures. Math: Correct hash behavior for floating point numbers. Platform: macOS: Add Ctrl+Click support for Right Click actions. Display: Add "expand" option for window stretch aspect.
Right-click your graphics card and choose Update driver. Right-click Football Manager 2024 and choose Properties. Click the Local Files tab. Right-click on each non-essential application and select Disable. Right-click on each one and select End Task to close them. Right-click it and select Properties.
Right-click on your graphics card and choose Update driver. Right-click on Like a Dragon Gaiden and select Properties. Click on the Local Files tab. Click on Verify Integrity of Game Files. Right-click on the executable and select Properties. Click on the Compatibility tab. Click Apply and then OK.
Rendering engineers are rare to find, so this can be a starting point. At the end of the day, the use case where Vulkan and DirectX12 make the most sense is when you have hundreds of thousands of objects, which are all different (different geometry, textures, etc.), In clustered rendering, they are obtained via 3D texture + indices.
Right-click on it and select Properties. Verify The Invincible’s Game Files I always make it a point to verify the game files if I encounter any glitches or crashes. Go to the Library section and right-click on The Invincible. Click on the Verify Integrity of Game Files button and wait for the process to complete.
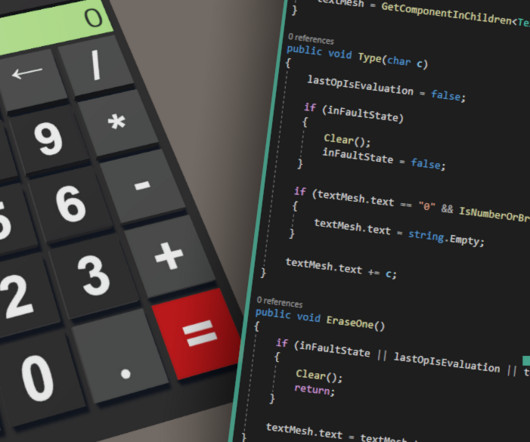
I have also prepared a starter package for you, which includes meshes, textures, materials, and a prefab with an assembled calculator using these assets. In the TMP Importer window, click on "Import TMP Essentials" Finally, expand the Calc game object in the Hierarchy tab. Invoke(); if (invokeOnPressed) { OnPressed?
Additionally, I tested the solutions featured on multiple devices, and I used a system restore point to generate the low fps issue multiple times to find a variety of efficient fixes. Click ‘Check for updates’ and follow the prompts to update your drivers. Find the.exe file, right-click it, and choose Properties.
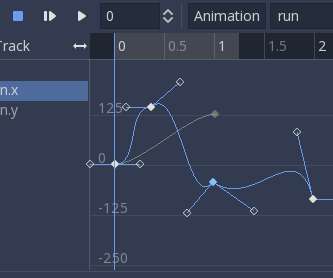
Changing sprite textures, colors, animation frames, calling functions, playing animations in other animation players, playing sounds, etc. Keys can also be inserted at any position in the timeline by simply right-clicking over the track at a given position in time. Animation editing was one of the first distinctive Godot features.
You can pass an array filled with textures to the shader with the set_shader_param() function and it should work. A new context menu is called via right-click if nodes are selected. 3D textures now have their representatives nodes in visual shaders: CurveTexture node. Predefined floating-point constants. Context menu.
From Breakdown to Budget in Clicks Save time, cut costs, and let Filmustages AI handle the heavy lifting all in a single day. The quality of tracking markers and reference points greatly affects the final result. These lights are basic reference points for compositing work.
The view is not constrained anymore and panning can be done with the right click. Merging atlases will automatically gather tiles from all atlases and create a new one with its associated new texture. Backward compatibility improvements. To improve backward compatibility, tiles from 3.x Here is an example workflow where I port the 3.x
For example, there’s no point trying to fine-tune your shader if the real problem is that you have low GPU utilization because you have lots of tiny dispatches with barriers between them all. In the Analysis panel of GPU Trace (Figure 2), double-click or hover over the marker for the range to analyze, in this case, DispatchRays[0] : Figure 2.
Since we previously did not version our Android plugin systems, this new one is now labelled v1 , and is the starting point for the modern Godot Android ecosystem. Better handling of Variant s pointing to released Object s. AStar: Make get_closest_point() deterministic for equidistant points ( GH-39409 ). Porting existing 3.2
For gamers to have an immersive and interesting experience, visual components such as graphics, textures, animations, and special effects are crucial. Human interaction involves touching a button rather than clicking it, and Airtest provides that feature for interacting with UI elements in games and mobile applications.
Since we previously did not version our Android plugin systems, this new one is now labelled v1 , and is the starting point for the modern Godot Android ecosystem. Editor: Improved go-to definition (Ctrl + Click) in script editor ( GH-37293 ). GLES2/GLES3: Add support for OpenGL external textures ( GH-36342 ).
Since we previously did not version our Android plugin systems, this new one is now labelled v1 , and is the starting point for the modern Godot Android ecosystem. AStar: Make get_closest_point() deterministic for equidistant points ( GH-39409 ). Editor: Improved go-to definition (Ctrl + Click) in script editor ( GH-37293 ).
Since we previously did not version our Android plugin systems, this new one is now labelled v1 , and is the starting point for the modern Godot Android ecosystem. AStar: Make get_closest_point() deterministic for equidistant points ( GH-39409 ). Editor: Improved go-to definition (Ctrl + Click) in script editor ( GH-37293 ).
Since we previously did not version our Android plugin systems, this new one is now labelled v1 , and is the starting point for the modern Godot Android ecosystem. AStar: Make get_closest_point() deterministic for equidistant points ( GH-39409 ). Editor: Improved go-to definition (Ctrl + Click) in script editor ( GH-37293 ).
You can download the assets and the complete project for this tutorial by clicking on the button above. We’ll start with the Player_Character folder: Inside the Player_Character folder Right Click and create a new blueprint: The parent class is going to be Character: Name the blueprint BP_Player and open it in the editor window.
In Fantasy Strike, you just click on anyone in your in-game friends list to challenge them. You just click on them to challenge, and that’s it. It’s intentional that you click once to challenge, they accept, then you are playing. Fantasy Strike uses GGPO’s rollback-style netcode, which at this point is not an innovation.
Since we previously did not version our Android plugin systems, this new one is now labelled v1 , and is the starting point for the modern Godot Android ecosystem. Editor: Improved go-to definition (Ctrl + Click) in script editor ( GH-37293 ). GLES2/GLES3: Add support for OpenGL external textures ( GH-36342 ).
Notable changes are in-editor class reference translations (so far Chinese (Simplified), Spanish, and some French), some new rendering features (high quality glow mode, 3D point light attenuation option), and a number of C# marshalling fixes. Rendering: Fixes depth sorting of meshes with transparent textures ( GH-50721 ).
Once she had the base down, Bianca then started adding in the unique details included in the concept, like the sharp, pointed spinal fins along the character's head, neck, and back—and the fine, thin webbing between its fingers. During his first official pass, Pete was finally able to make the textures and shaders work in tandem.
Rendering: Fixes depth sorting of meshes with transparent textures ( GH-50721 ). Rendering: Add new 3D point light attenuation as an option ( GH-52918 ). Animation: Fix rendering centered odd-size texture for AnimatedSprite/AnimatedSprite3D ( GH-53052 ). GLES3: Allow repeat flag in viewport textures ( GH-34008 ).
We organize all of the trending information in your field so you don't have to. Join 5,000+ users and stay up to date on the latest articles your peers are reading.
You know about us, now we want to get to know you!
Let's personalize your content
Let's get even more personalized
We recognize your account from another site in our network, please click 'Send Email' below to continue with verifying your account and setting a password.


Let's personalize your content