This site uses cookies to improve your experience. To help us insure we adhere to various privacy regulations, please select your country/region of residence. If you do not select a country, we will assume you are from the United States. Select your Cookie Settings or view our Privacy Policy and Terms of Use.
Cookie Settings
Cookies and similar technologies are used on this website for proper function of the website, for tracking performance analytics and for marketing purposes. We and some of our third-party providers may use cookie data for various purposes. Please review the cookie settings below and choose your preference.
Used for the proper function of the website
Used for monitoring website traffic and interactions
Cookie Settings
Cookies and similar technologies are used on this website for proper function of the website, for tracking performance analytics and for marketing purposes. We and some of our third-party providers may use cookie data for various purposes. Please review the cookie settings below and choose your preference.
Strictly Necessary: Used for the proper function of the website
Performance/Analytics: Used for monitoring website traffic and interactions
Add transparency support for LightmapGI Currently when bakinglightmaps users have to choose between transparent objects casting shadows as if they were fully opaque, or not casting shadows at all. This has been a major limitation in both the quality of lightmapbaking and the ergonomics of the lightmapbaking workflow.
We asked them to write a progress report to present what they're working on and the current status. x CPU lightmapper and adding a new debug draw mode for visualizing the texel density of lightmaps. Previously every LightmapGI node used to store its lightmap atlas in a single large image. Project overview and progress.
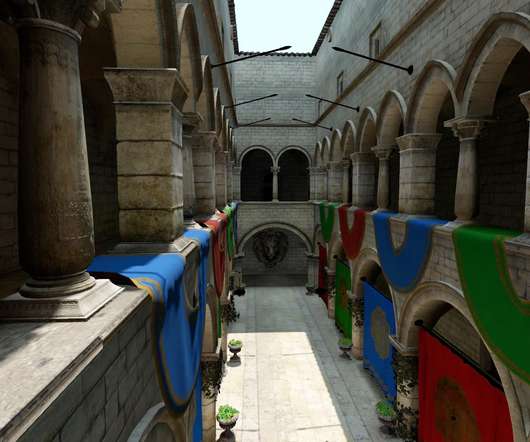
SDFGI is something akin to a dynamic real-time lightmap (but it does not requiere unwrapping, nor does it use textures). Ensure your meshes are marked as "Static Bake", then enable SDFGI in the Environment settings. Will write an article about this soon. What can it do? How do you use it? How does it work?
In my previous post, I mentioned that I would be write a series of articles on Cocos Cyberpunk. 2、LightFX The lightmaps generated by the LightmapBaking System will be automatically stored in this folder, and there is no need to manually modify the contents inside it. Hey everyone, Kylin here!
It was reusing parts of the code for baking GIProbes, and that made it quick but not great in terms of quality. was still far away, so we tasked Joan Fons ( jfons ), as part of the GSoC program, to write a new CPU lightmapper for Godot 3.x. Back in summer 2019 we already knew Godot 4.0 More rendering improvements.
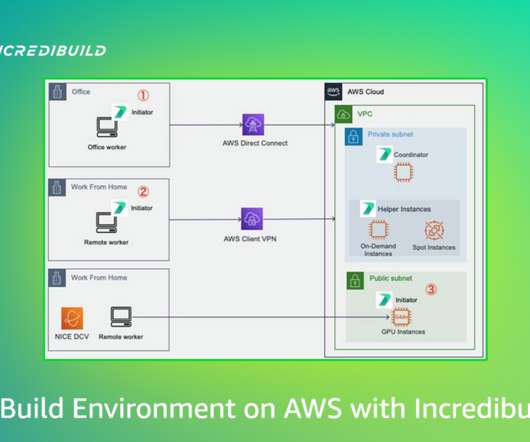
Game developers often need to compile large amounts of C++ code, which requires lots of CPU resources, and developers also need to process other types of heavy compute tasks such as; shader compilation, rendering, asset creation, image conversion, lightmapbaking and more.
Just set up the probe bounds and do a fast pre-bake of static objects. No lightmaps or anything of the sort are required, providing a very quick and efficient workflow. For low-end systems or mobile devices, we provide a more classical lightmapping workflow. writing shaders is very easy! It's also very easy to use.
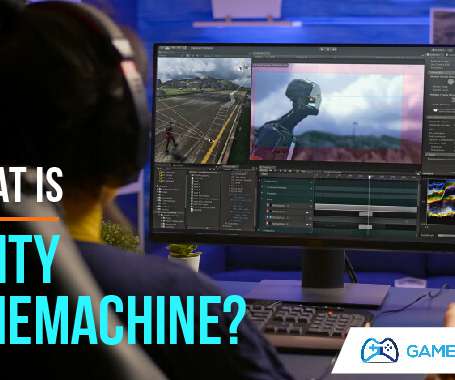
When using Cinemachine, you don’t need to know how to write code, though coding is still essential for some components, such as scripting how a user zooms using a mouse wheel, for example. As of yet, there is no distributed baking. This basically means you can only bakelightmaps using a single machine.
Use bakedlightmaps instead. GDScript allows to write code in a quick way within a controlled environment. Does not always catch errors during compile (or write) time. Support for root motion as well as the ability to write your own custom blend nodes has also been added. GIProbes of course don't work.
Last but not least, lightmapsbaking is now done using the GPU to speed up the process significantly. You can even create complex dynamic effects by writing custom shaders that operate on FogVolume nodes. The new NavigationServer supports fully dynamic environments and on-the-fly navigation mesh baking. Of course, the 4.0
Core: Fix read/write issues with NaN and INF in VariantParser ( GH-47500 ). Lightmapper: Add an editor setting to configure number of threads for lightmapbaking ( GH-52952 ). Scene: Write node groups on a single line when saving a.tscn file ( GH-52284 ). Please try it out and report any issue.
Core: Fix read/write issues with NaN and INF in VariantParser ( GH-47500 ). Lightmapper: Add an editor setting to configure number of threads for lightmapbaking ( GH-52952 ). Scene: Write node groups on a single line when saving a.tscn file ( GH-52284 ). Please try it out and report any issue.
Core: Fix read/write issues with NaN and INF in VariantParser ( GH-47500 ). Lightmapper: Add an editor setting to configure number of threads for lightmapbaking ( GH-52952 ). Scene: Write node groups on a single line when saving a.tscn file ( GH-52284 ). Please try it out and report any issue.
Core: Fix read/write issues with NaN and INF in VariantParser ( GH-47500 ). Lightmapper: Add an editor setting to configure number of threads for lightmapbaking ( GH-52952 ). Scene: Write node groups on a single line when saving a.tscn file ( GH-52284 ). Please try it out and report any issue.
However, based on the BlitScreen solution, we can only write the simplest post-effect Shader. Today Kylin will use Gaussian blur to demonstrate how to write a multi-pass post-effect shader. To create, we create a Cocos Shader file named “gaussian-blur.effect” and write the following. Note: In Cocos Creator 3.8.0,
We organize all of the trending information in your field so you don't have to. Join 5,000+ users and stay up to date on the latest articles your peers are reading.
You know about us, now we want to get to know you!
Let's personalize your content
Let's get even more personalized
We recognize your account from another site in our network, please click 'Send Email' below to continue with verifying your account and setting a password.


Let's personalize your content