This site uses cookies to improve your experience. To help us insure we adhere to various privacy regulations, please select your country/region of residence. If you do not select a country, we will assume you are from the United States. Select your Cookie Settings or view our Privacy Policy and Terms of Use.
Cookie Settings
Cookies and similar technologies are used on this website for proper function of the website, for tracking performance analytics and for marketing purposes. We and some of our third-party providers may use cookie data for various purposes. Please review the cookie settings below and choose your preference.
Used for the proper function of the website
Used for monitoring website traffic and interactions
Cookie Settings
Cookies and similar technologies are used on this website for proper function of the website, for tracking performance analytics and for marketing purposes. We and some of our third-party providers may use cookie data for various purposes. Please review the cookie settings below and choose your preference.
Strictly Necessary: Used for the proper function of the website
Performance/Analytics: Used for monitoring website traffic and interactions
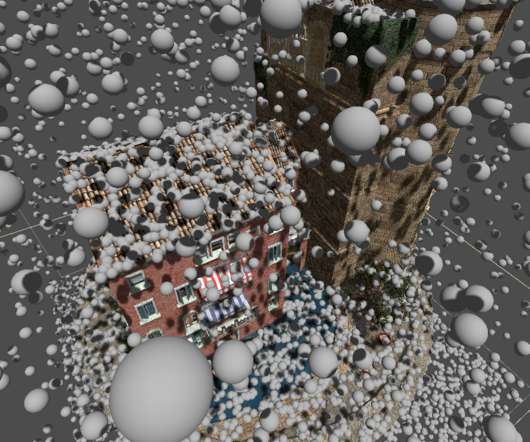
Add transparency support for LightmapGI Currently when baking lightmaps users have to choose between transparent objects casting shadows as if they were fully opaque, or not casting shadows at all. This has been a major limitation in both the quality of lightmap baking and the ergonomics of the lightmap baking workflow.
A couple fixes to the text resource loader which could impact notably reloading scripts ( GH-71170 ). Navigation: Fix for navmesh baking when parsing StaticBody colliders ( GH-70904 ). Rendering: Only disable depth writing in opaque pipelines ( GH-71124 ). Fix Tab key usage in the inspector ( GH-71271 ).
GPUParticles : Processes particles on GPU, allows very large amount of particles at little cost, and with ability to write custom particle shaders. To solve this, it is now possible to emit particles manually by calling a function from the script API: Sub-Emitters. Emitting particles manually is not only possible from script.
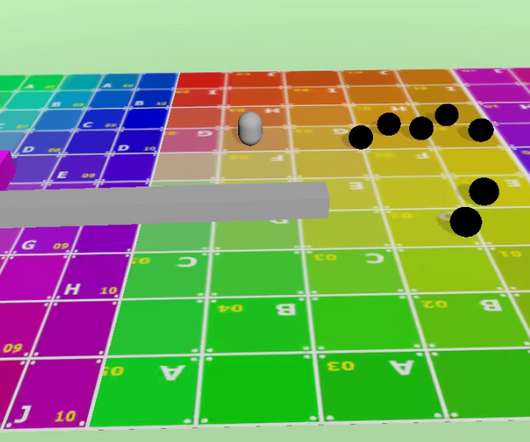
Runtime navigation mesh baking. Now the NavigationRegion can be added during gameplay, and it's possible to change its transform or even bake the navigation mesh data at runtime. Remember to hit the button Bake NavMesh to bake the navigation data, as you used to do in 3.x! Collision avoidance support. Navigation Agent.
You should concentrate on building up your writing portfolio and getting regular game writing work. They’re related, but the difference is this: A game writer’s primary responsibility is to promote the story that the game tells through the scripts they write. Creative writing. Technical writing.
We asked them to write a progress report to present what they're working on and the current status. Project: Allow undocking the Script editor and the Shader editor. In this project, I'll focus to make the Script editor and the Shader editor undockable, and keep the undocked windows after editor restarts. Student: trollodel.
A couple fixes to the text resource loader which could impact notably reloading scripts ( GH-71170 ). Navigation: Fix for navmesh baking when parsing StaticBody colliders ( GH-70904 ). Rendering: Only disable depth writing in opaque pipelines ( GH-71124 ). Fix Tab key usage in the inspector ( GH-71271 ).
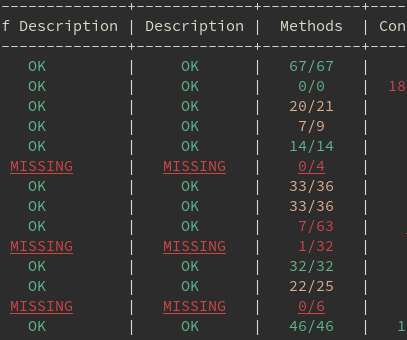
You can get a nice overview for yourself using bojidar_bg's awesome script in doc/tools/doc_status.py ). light baking, networking, plugins, pathfinding, etc.). We are also thinking about writing tutorials attached to each of them for you to learn how they work. Out of which only 34% have proper descriptions so far. How to help?
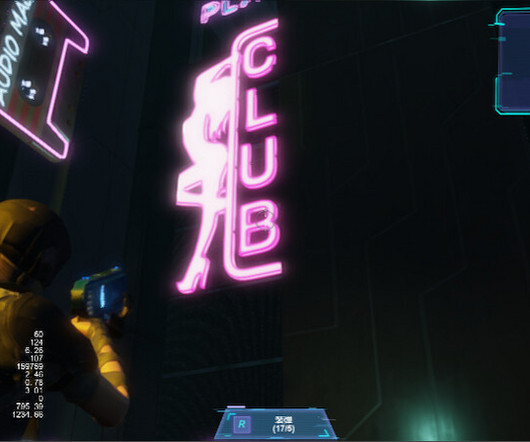
In my previous post, I mentioned that I would be write a series of articles on Cocos Cyberpunk. 2、LightFX The lightmaps generated by the Lightmap Baking System will be automatically stored in this folder, and there is no need to manually modify the contents inside it. 7、scripts Store all of the gameplay scripts.
SheepIT statistic on 2022-08-30 As you can see from the screenshot above, at the time I'm writing this, there are 584 clients connected that are rendering 491 frames at the same time. As an example, right now as I'm writing this article I run SheepIt client and it earns points that I will be able to use later for my own projects.
It was reusing parts of the code for baking GIProbes, and that made it quick but not great in terms of quality. was still far away, so we tasked Joan Fons ( jfons ), as part of the GSoC program, to write a new CPU lightmapper for Godot 3.x. Back in summer 2019 we already knew Godot 4.0 More rendering improvements.
which would have included new multiplayer networking, visual scripting and many other improvements) because we realized that projects using the new features would no longer work in 3.0, Visual Scripting. Just set up the probe bounds and do a fast pre-bake of static objects. writing shaders is very easy! GPU particles.
We're now in the middle of the GSoC 3-months coding period, and we asked students to write a progress report to present their project and the work done so far. Improvements to the Visual Scripting System by Swarnim Arun. Further optimizations will be done so it isn't necessary to process the same scripts again and again.
Before Unity Cinemachine, camera movement needed to be directly keyframed or, using code, had to be carefully scripted. When using Cinemachine, you don’t need to know how to write code, though coding is still essential for some components, such as scripting how a user zooms using a mouse wheel, for example.
Last but not least, lightmaps baking is now done using the GPU to speed up the process significantly. You can even create complex dynamic effects by writing custom shaders that operate on FogVolume nodes. Scripting them is simpler now as well. You can configure the effect globally, or define specific areas with FogVolume nodes.
The new NavigationServer adds support for obstacle avoidance using the RVO2 library, and navigation meshes can now be baked at runtime. adds the concept of "scene unique names" for nodes to help with the common task of accessing specific nodes from scripts. The whole API is now a lot more flexible than it used to be.
However, based on the BlitScreen solution, we can only write the simplest post-effect Shader. Today Kylin will use Gaussian blur to demonstrate how to write a multi-pass post-effect shader. To create, we create a Cocos Shader file named “gaussian-blur.effect” and write the following. Note: In Cocos Creator 3.8.0,
We organize all of the trending information in your field so you don't have to. Join 5,000+ users and stay up to date on the latest articles your peers are reading.
You know about us, now we want to get to know you!
Let's personalize your content
Let's get even more personalized
We recognize your account from another site in our network, please click 'Send Email' below to continue with verifying your account and setting a password.


Let's personalize your content