This site uses cookies to improve your experience. To help us insure we adhere to various privacy regulations, please select your country/region of residence. If you do not select a country, we will assume you are from the United States. Select your Cookie Settings or view our Privacy Policy and Terms of Use.
Cookie Settings
Cookies and similar technologies are used on this website for proper function of the website, for tracking performance analytics and for marketing purposes. We and some of our third-party providers may use cookie data for various purposes. Please review the cookie settings below and choose your preference.
Used for the proper function of the website
Used for monitoring website traffic and interactions
Cookie Settings
Cookies and similar technologies are used on this website for proper function of the website, for tracking performance analytics and for marketing purposes. We and some of our third-party providers may use cookie data for various purposes. Please review the cookie settings below and choose your preference.
Strictly Necessary: Used for the proper function of the website
Performance/Analytics: Used for monitoring website traffic and interactions
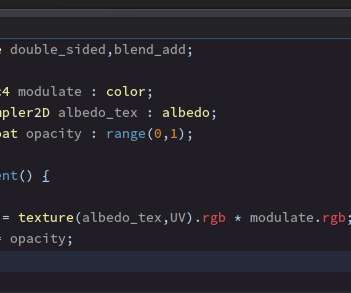
Use Compressed Textures : Textured images can be saved with lower resolutions while compressed formats such as ASTC and DXT1 and DXT5 reduce memory usage without quality reduction. Texture Atlasing combines multiple textures into one atlas to lower the number of texture switches that occur.
Blockquote const sprite = this.getComponent(Sprite); const mat = sprite.customMaterial; mat.setProperty(‘dissolveThreshold’, 0.5); Version 3.6.x, x, I using this code but it not bring Property affect to shader Ok, this work if turn of Packable in main Sprite inspector
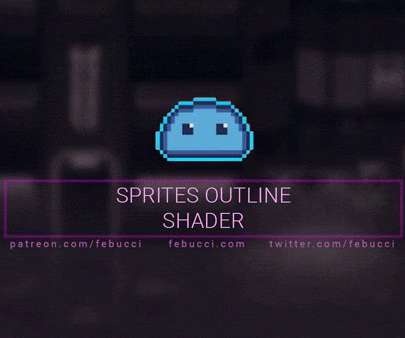
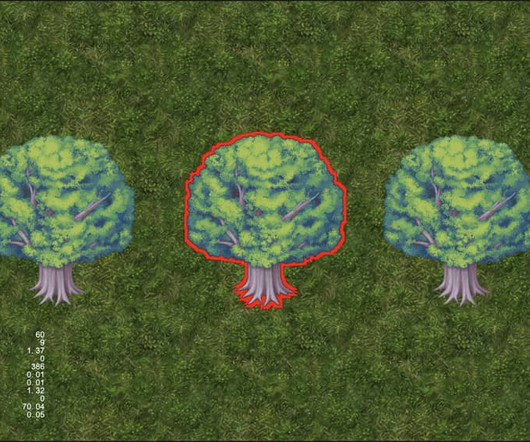
In this “Unity Sprite Outline” tutorial we’ll discover how to create both a “Sprite Innerline” and a “Outer Sprite Outline”. Simply, the Inner Sprite Outline shader is drawn “inside” the sprite, while “Outer” is the opposite. Read more about “Texture’s Texel Size” here. Inner Sprite Outline HLSL.
i wrote a little code to load asset texture from resource. i wrote a little code to load asset texture from resource. 0 ){ let l = new Node; this.node.insertChild(l,cnt); this.label[i][j] = l.addComponent(Sprite); const sf = new SpriteFrame(); sf.texture = tex[0]; this.label[i][j].spriteFrame var tex = Array(25).fill(new
first, I recommend you to follow the TS style when you are coding, that will make your code easy to read. from your code, I guess you want to load some text images and cache them to an array, then you use them to create the spriteFrames when needed. hello ,bro. for example, use let instead of var. the error comes out.
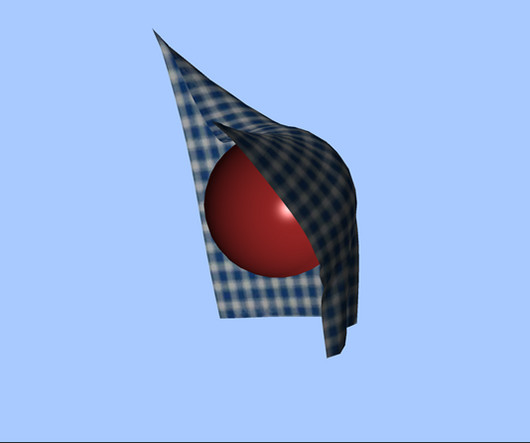
height)); I am considered myself as a beginner of GLSL shader coding and would be appreciated if anyone would explain to me and show me how to fix this. The goal is to make my effect able to follow the position of my node. 5 + ((gl_FragCoord.xy)/ iResolution.xy); p.x *= iResolution.x / iResolution.y; intensity); } }% // In typescript this.
I installed extensions in VS C (Cocos Effect, Shader languages support for VS Code) my next thought was to get into the shader to try working with the texture there, but I ran into difficulties: 1.) I couldn’t find the right package for working with textures to get pixel colors #include <common/texture/texture-lod> 2.)
Original: [link] Author: BitByBit Outer Stroke Effect for 2D Sprites Continuing from the previous article Inner Stroke Effect for 2D Sprites Introduction In the last article, we introduced the method of inner stroke and also discussed its pros and cons. _OutlineSize is the stroke width. It is roughly as shown below.
link] [link] [link] [link] [link] Prerequisites Some knowledge of code is definitely going to help here. I’ll be writing most code in Godot’s Gdscript, so familiarity with that or Python will help. The first thing to download will be the sprites and textures from the original tutorial.
To explain the idea of how shaders work, let's consider a very simple shader for drawing a sprite to the screen. Our sprite is 32x32 pixels in size, and it must be drawn at some position. The following OpenGL code sends the sprite to the shader for drawing: OpenGL Commands. Configuration parameters are sent via uniforms.
hi, I am leaning CC, I am more interested write code than using tool CC, but that is not working. I am using CC version 3.8.1 I am using CC version 3.8.1 createAnimationArray(bien,['23020_0_8', '23020_0_9', '23023_3_6'], 0.1, createAnimationArray(bien,['23020_0_8', '23020_0_9', '23023_3_6'], 0.1,
or better : with 3D scenes Origins Two days ago, I saw a fun effect: The article was: Dazzling HTML5 Front End Design Source Code Analysis Notes - Remnant Clothes Effect Example: Tearable Grid It is an effect that I’ve seen before and recently brushed up on. So I researched the code and prepared to port it to Cocos.
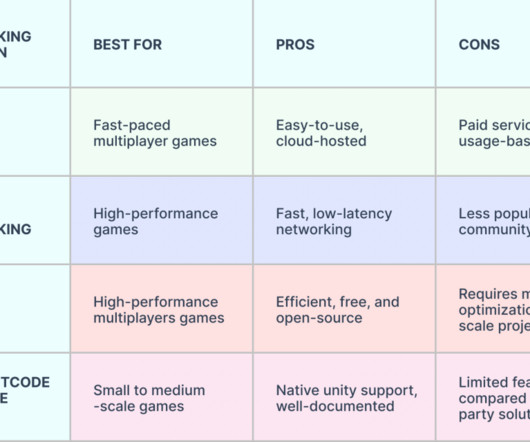
Inworld AI (a no-code solution) for Unity allows us as users to create generative AI characters with expressive personalities, memories, knowledge, motivations, natural dialogue, and more that make them more lifelike. Also, its suite of AI tools reduced the creation time giving us the green light to be more creative and innovative.
The other variant is a elapsedTime i.e the time that I manually increase in the material inspector, to simulate time. 1.0 - newUV.x), min(newUV.y, 1.0 - newUV.y)); // Calculate the flame distortion amount based on the distance from the edge float distortionAmount = flameIntensity * (1.0 - smoothstep(0.0, 1.0 - newUV.x), min(newUV.y,
Additionally, all 2D shadows and light textures use a single atlas, resulting in improved performance. the new CanvasTexture texture type has been introduced. x is that, several times, sprites are separated in many nodes in order to be animated or assembled. Improved 2D materials. Using normal mapping in 2D was also hit or miss.
Think AI that helps you build landscapes, real-time 3D sculpting like magic, and coding made accessible even for total newbies. Grab your controller because this blog is your cheat code for building the next gaming masterpiece – for free! But that’s not all! So, are you ready to unleash your inner game developer?
The most commonly used method involves rendering the camera to a RenderTexture (RT) and then displaying it on a Sprite. Taking inspiration from community experts @gamemcu and @iwae for the ultimate solution, we can use code to directly display the post-processed RT rendered by the camera onto the final window.
I haven’t benchmarked the code here with and without object pooling, so I don’t know if it is necessary, or even whether it is potentially harmful. Locked = 0000 Selected = 0001 Locked = 0010 Both Selected and Locked = 0011 Next is the export values that we will assign our objects and textures to. script to it.
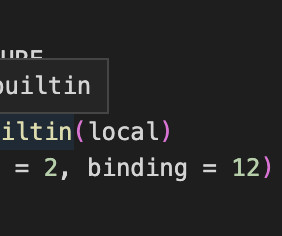
A lot of text and no code so far, so here you go! Here is a link to a file to show what "low level class registering" might look like in future (this is already working code). Texture handles? With UBOs, this comes natural, and very similar code exists in the GLES3 renderer. Since OpenGL 3.1, Part of a UBO.
Most of the internal code in Godot was written over a decade ago, and many design decisions that were taken back then, did not stand the test of time. The result of this work has been mostly a lot of simplification in the internals, resulting in more performance and more readable code. While the 3.0 Internal changes. Better locking.
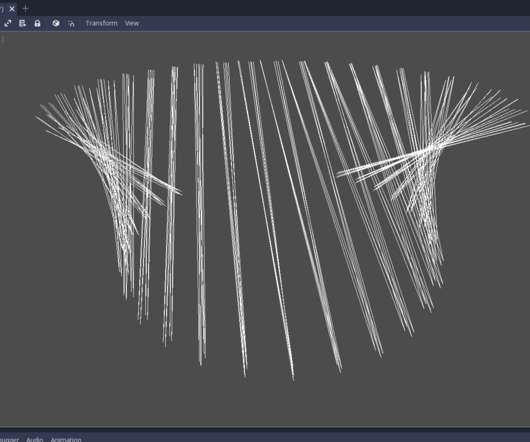
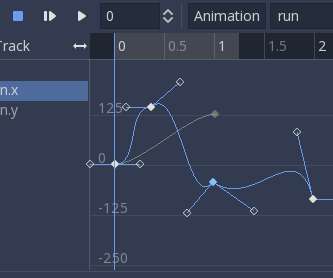
Changing spritetextures, colors, animation frames, calling functions, playing animations in other animation players, playing sounds, etc. The reason for this is that the code behind animation editing was too hard-coded in general, which made it difficult to add new features or improvements.
This drastically reduces drawcall-related bottlenecks and can give massive gains in specific scenarios (drawing lots of sprites, big TileMaps, text rendering). Top: 10,000 Sprites with a randomized modulate and position. Bottom: 8 layers of a screen full of "A"s with two Sprites intermixed. Can you spot the difference?
all rendering code was rewritten to use the more modern OpenGL ES 3.0 / OpenGL 3.3 GDScript allows to write code in a quick way within a controlled environment. As any dynamically typed language, it allows churning out large amount of code at a high speed. Code can be less readable and difficult to refactor. The Godot 2.x
Let's do it by hand before we start coding. using System; using System.Collections.Generic; public class RPN { private readonly StackConsoleLogged<double> stack = new(); } We're using our StackConsoleLogged decorator; you can safely replace the type here with just Stack , and it won't affect any other code.
Platform specific code: Application.isMobilePlatform is false for iPads; there's no built-in Unity way to detect iPads on WebGL, you have to do weird stuff with an external.jslib that sniffs the user agent string and passes it back to Unity. Spritesheets: using the Sprite Atlas for 2D games is a must, if you haven't been doing that already.
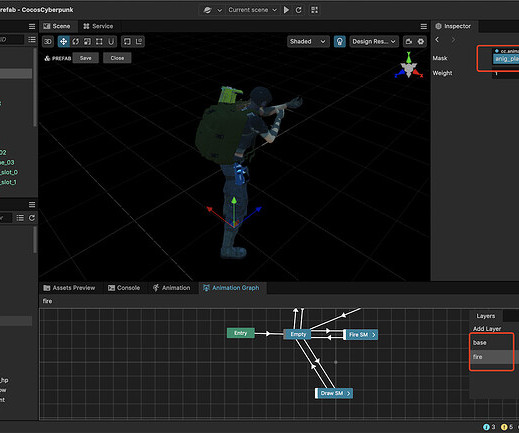
Not only is it 100% ope… Project Structure - Guide to Cocos Cyberpunk Source Code Cocos Creator [01] Hey everyone, Kylin here! This series of articles will provide an in-depth interpretation of the source code from various perspectives, enhancing everyone’s learning efficiency.
Some of the features were added just because they were fun to code and have this “cool” factor about them. GDScript is my favorite as you can do a lot with a little bit of code. Overriding properties like script variables, or sprite color via modulate property, allows to make asset variations easily.
In the downloaded files you’ll find assets to follow with this tutorial and the complete project you can use as a reference to inspect the code. The only difference between this code and the one we’ve been using in previous tutorials is that we are using the ehnaced input action nodes. Important Information Before We Start.
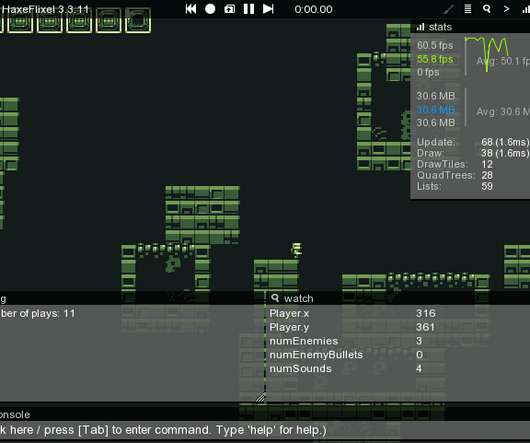
The engine should be able to render and simulate 200+ lightweight game objects -- frame-animated sprites with simple collision, no fancy physics or shaders. I also liked how Haxe has decent autocompletion support in VS Code, which reduces (but doesn't quite eliminate) all the documentation hunting. and no WASM.)
Whether this position will be in normalized coordinates from 0 to 1 or in a value from 0 to the width/height of the sprite - 1, it is not so important to me. I need the shader exclusively for the UI, it will be used with the Sprite component. But as soon as I set my test material in CustomMaterial, the entire sprite turns white.
My code is as follows - if ( url.includes("png")) { ext = ".png"; However my node’s sprite’s spriteFrame is still null. However the URL doesnt end with “.png”, png”, hence I am passing the extension as mentioned in the doc.
Remember the golden days of 2D sprites and pixel-perfect jumps? Then came photorealistic characters, 4K textures, and entire worlds rendered in real time. The usual tips, like compress textures or use LODs, only scratch the surface. Use Sprite Atlases. For developers, thats the nightmare. But with scale comes complexity.
We organize all of the trending information in your field so you don't have to. Join 5,000+ users and stay up to date on the latest articles your peers are reading.
You know about us, now we want to get to know you!
Let's personalize your content
Let's get even more personalized
We recognize your account from another site in our network, please click 'Send Email' below to continue with verifying your account and setting a password.


Let's personalize your content