This site uses cookies to improve your experience. To help us insure we adhere to various privacy regulations, please select your country/region of residence. If you do not select a country, we will assume you are from the United States. Select your Cookie Settings or view our Privacy Policy and Terms of Use.
Cookie Settings
Cookies and similar technologies are used on this website for proper function of the website, for tracking performance analytics and for marketing purposes. We and some of our third-party providers may use cookie data for various purposes. Please review the cookie settings below and choose your preference.
Used for the proper function of the website
Used for monitoring website traffic and interactions
Cookie Settings
Cookies and similar technologies are used on this website for proper function of the website, for tracking performance analytics and for marketing purposes. We and some of our third-party providers may use cookie data for various purposes. Please review the cookie settings below and choose your preference.
Strictly Necessary: Used for the proper function of the website
Performance/Analytics: Used for monitoring website traffic and interactions
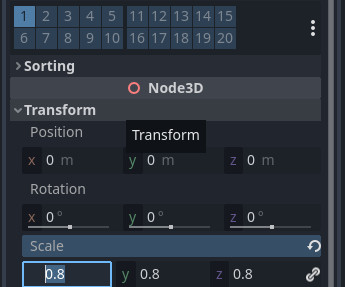
I’ll be writing most code in Godot’s Gdscript, so familiarity with that or Python will help. You can download Godot here – [link] Click the link to Download the 4.x x version(at the time of writing that is 4.1.3) Unzip the folder and click on the program.exe(it should be something like “Godot_v4.1.3-stable_mono_win64.exe”)
supports advanced global illumination techniques such as lightmapping (including SH lightmapping), Voxel GI (which is fully real-time) and SDFGI (which is a single click, open world GI solution). x point releases (which we are now intending to do more often, allowing several releases per year). Additionally, Godot 4.0
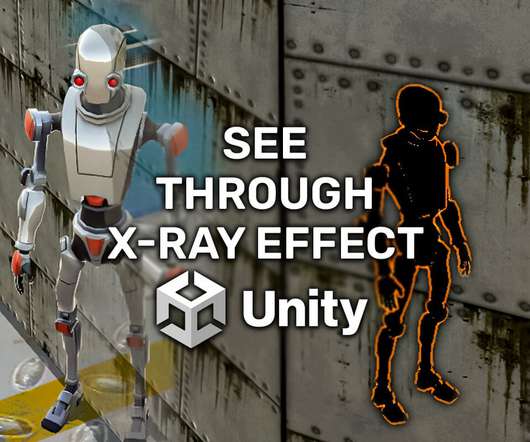
A shader is a script where you write code that determines how the colors will be rendered based on various scenarios like lighting and material configuration. Inside of that folder Right Click -> Create -> Shader -> Standard Surface Shader: Give the shader script name SeeThrough and open it in Visual Studio.
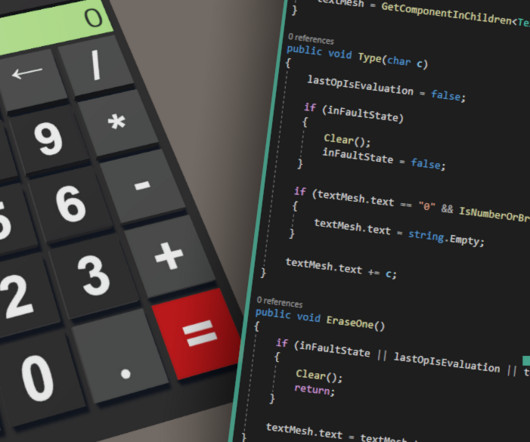
I have also prepared a starter package for you, which includes meshes, textures, materials, and a prefab with an assembled calculator using these assets. In the TMP Importer window, click on "Import TMP Essentials" Finally, expand the Calc game object in the Hierarchy tab. Now, let's write our Press method.
A very common request, though, was the ability to do custom mesh deformation based on the same bones used to animate separate parts. This allows, however for the community to write importers for tools such as Spine or CoaTools that become actual Godot scenes instead of an opaque node. Once there, click the + button to add points.
Notable changes are in-editor class reference translations (so far Chinese (Simplified), Spanish, and some French), some new rendering features (high quality glow mode, 3D point light attenuation option), and a number of C# marshalling fixes. GridMap: Implement individual mesh transform for MeshLibrary items ( GH-52298 ).
You can download the assets and the complete project for this tutorial by clicking on the button above. We’ll start with the Player_Character folder: Inside the Player_Character folder Right Click and create a new blueprint: The parent class is going to be Character: Name the blueprint BP_Player and open it in the editor window.
So I’m going into the project tab and I’m going to click on assets to get to the main assets folder of Unity, and I’m going to right-click in here and create a new folder called Scripts and we are going to create our first script. (00:59) Like for example, we have the mesh renderer that we have up here. (01:55)
I have actually wanted to write about this topic for a long time, but to clarify this topic, it’s not enough to just talk about it. The above words may have seemed too abstract, let’s get straight to the point, the main content of this article. Click on start to enter game, and you will see the following effect.
We asked them to write a progress report to present what they're working on and the current status. When the Script button is clicked and the Script editor is undocked, the Script editor window is focused. The idea is to overlay a checkerboard pattern with the same square size (in texels) on the textures of all the meshes.
Manage game collectibles like gold, money or points. Oftentimes you’ll want your trigger to be invisible, and if you want your trigger to be invisible, you can just turn off the mesh renderer of the object here, and that will remove the mesh of the cube. Be sure to write the tag properly as this tag is case sensitive.
Since we previously did not version our Android plugin systems, this new one is now labelled v1 , and is the starting point for the modern Godot Android ecosystem. The Android plugin documentation has been updated with instructions on how to write plugins for this new system. Better handling of Variant s pointing to released Object s.
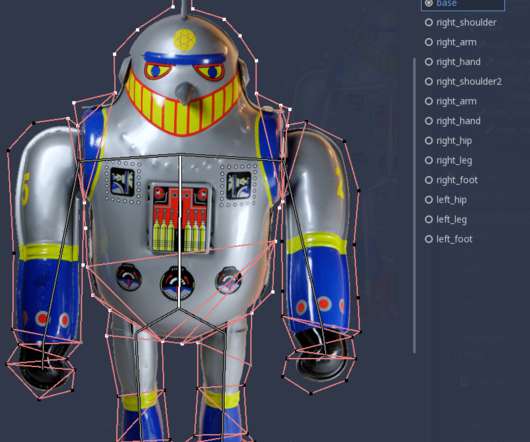
A quick demo on how to set up, rig and animate a 2D character in Godot Engine using 2D meshes and the Skeleton2D node. Aleksandar previously worked on award winning and critically acclaimed point-and-click adventures, and is now a producer for Trip the Ark Fantastic. Demo: Character rigging using Skeleton2D | Matejs Balodis.
A lot of developers prefer to use their familiar tools when it comes to writing and debugging code. Since DAP is a platform-agnostic protocol, it also shouldn't require any custom plugins or anything of the sort; just point your compatible editor to the right port ( 6009 by default) , and you're good to go! Branch: Ev1lbl0w/gsoc21-dap.
We organize all of the trending information in your field so you don't have to. Join 5,000+ users and stay up to date on the latest articles your peers are reading.
You know about us, now we want to get to know you!
Let's personalize your content
Let's get even more personalized
We recognize your account from another site in our network, please click 'Send Email' below to continue with verifying your account and setting a password.


Let's personalize your content